
Growing seedlings can be tricky without the right tools, especially if a commercial heat mat feels out of reach.
Luckily, you can create a safe and inexpensive heat source using things like a warm fridge covered with a towel or a simple rope light buried in sand.
With some easy monitoring, you’ll be surprised at how well these DIY methods work.
The secret to success is in how you set it all up and keep an eye on the soil temperature.
Why Bother With a Heat Mat in a Cool House?
A heat mat is essential because seed germination depends on soil temperature, not air temperature. Cool trays placed near windows or on floors often stay well below the 70°F to 90°F range that most warm-season crops need to sprout successfully. Without bottom heat, germination rates drop significantly; for example, tomatoes achieve only about 50% germination at 60°F, but with a heat mat, rates can increase to over 90% at 75°F. For those who prefer a different rooting medium, rockwool cubes are a top-rated growing medium that provide excellent moisture retention and support for hydroponic seedlings. Using a heat mat also speeds up germination and helps make sprouting more even, reducing the vulnerable seed stage. It compensates for drafty rooms and cooler house temperatures, ensuring consistent soil warmth. This makes seed-starting more predictable and reliable. Pairing a heat mat with proper watering and appropriate light ensures your seedlings develop strong and healthy roots, turning marginal conditions into a thriving start for your plants. For optimal growth, these seedlings also benefit from full spectrum LED lights that mimic natural sunlight, especially in low-light indoor environments. Coco coir is an excellent alternative growing medium that retains moisture well while providing good root aeration for young plants.
3 DIY Alternatives to a Heat Mat That Actually Work
You can effectively substitute a commercial heat mat with several DIY methods that provide reliable warmth for germination. One simple approach is to use a warm appliance top, such as your fridge, and place your seed trays directly on it. Cover the trays with a towel to distribute the heat evenly and maintain consistent warmth. For an even more effective substrate, consider mixing in premium coco coir for excellent moisture retention and aeration. Before using any soil or perlite in your trays, ensure it is free of pathogens by employing simple sterilization tips such as baking or steaming.
Another method involves creating an enclosed germination chamber using a light-box setup filled with incandescent bulbs. The gentle heat from the bulbs replicates the warmth of a heat mat without extra equipment. Be sure to monitor the temperature regularly to prevent overheating.
For larger batches, burying heat cable or rope lights in a shallow bed of sand can evenly distribute heat across soil or seed trays. This technique helps maintain a steady temperature throughout the batch.
Lastly, you can use a warm-water thermal mass, such as sealed bottles filled with warm water. These bottles provide localized warmth and can be repositioned as needed. Remember to replace the water regularly to keep the temperature consistent and prevent stagnation. These low-cost setups offer the same gentle warmth as professional bamboo shears that are carefully selected for durability and precision.
Using these methods, you can achieve reliable germination without investing in a commercial heat mat.

✓ Consistent & Uniform Heating: BN-LINK seedling heat mat for seed starting maintains temperatures around 70–85℉, creating ideal conditions for seed starter and cutting propagation, speeding up seed germination and accelerating seedlings growth. The advanced heating film with double insulation layers ensures even heat and prevents scorching roots.

Reliable Results: The VIVOSUN professional heat mat maintains optimal temperatures around 68-86℉ (20-30℃), perfect for Seedling start and cutting propagation; Made from durable PVC material, it's designed to last

✓ EFFORTLESS SET UP: Easily program your desired temperature or switch between Fahrenheit and Celsius using just 3 buttons on this temperature controller. Please note: The BN-LINK reptile thermostat controller is intended for heating devices only, such as reptile heating pads, seedling heat mats, and heat lamps.
How to Set Up Your Seed Tray for Even Heat Distribution
To ensure even heat distribution in your seed tray, place it directly on the warming surface without any towels or loose spacers. These barriers block conduction, reducing effective heat transfer. Arrange multiple trays edge-to-edge so there are no gaps; this maintains continuous contact and helps distribute heat uniformly. Fill each cell evenly and keep the growing medium consistently moist, as moisture facilitates better heat transfer. For proper lavender maintenance, you will similarly need sharp pruning shears that cut cleanly without crushing stems. Insert the temperature probe into the center cells, positioning it into the medium rather than near the edges. Test several points across the tray to identify hot or cold spots, then adjust the tray’s position as needed to achieve balanced warmth throughout. For similar applications, perlite for succulents provides excellent drainage and aeration to prevent root rot. Maintaining the correct nutrient solution pH is also critical for healthy root development in hydroponic systems.
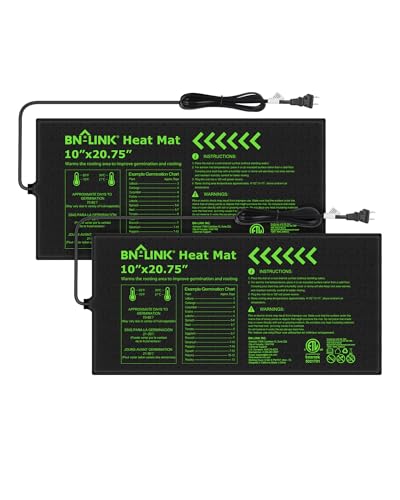
IDEAL GERMINATION TEMPERATURE: The BN-LINK seedling heat mats for seed starting helps maintain temperatures around 70°F to 85°F, the optimal range for seed germination, cutting propagation, and healthy seedling growth. Achieve faster germination and higher growth rates with seed heating mat.

Reliable Results: The VIVOSUN professional heat mat maintains optimal temperatures around 68-86℉ (20-30℃), perfect for Seedling start and cutting propagation; Made from durable PVC material, it's designed to last

Reliable Results: The VIVOSUN professional heat mat maintains optimal temperatures around 68-86℉ (20-30℃), perfect for Seedling start and cutting propagation; Made from durable PVC material, it's designed to last
Monitor Soil Temp With a Thermometer, Not Your Fingers
Using a thermometer is the best way to monitor soil temperature accurately. A dial or digital model with a 6-inch probe is ideal for seed starting. Insert the probe into the soil 1 to 2 inches deep, ensuring it’s not just at the surface but within the root zone for precise measurements. Hold the thermometer in place for about a minute until the reading stabilizes.
Check multiple spots across the tray because soil heat can vary between areas and throughout the day. Take readings in the morning and afternoon to account for fluctuations. Match your heat mat’s temperature output to your crop’s ideal range—around 70 to 90°F for peppers, and 60 to 70°F for lettuce. Record your temperature readings over several days to confirm consistent conditions. For precise control, you can use a pH meter to verify that the water you use on your seeds isn’t acidic enough to affect soil chemistry or root uptake. Relying on touch is unreliable; a thermometer provides the accuracy needed for successful germination.
Just as you would compare the lifespan and cost of different materials for a project, consistent temperature monitoring ensures your heat mat investment pays off through reliable germination results. For a more comprehensive setup, you can incorporate this thermometer into a DIY hydroponic system to monitor root zone temperatures in your nutrient solution.
When to Turn Off the Heat Mat After Germination
Once your seedlings have emerged, it’s important to turn off the heat mat within 24 hours or as soon as about half of your seeds have sprouted. Continued bottom heat after germination can cause seedlings to become leggy, weak, and prone to damping-off disease. For cool-season crops like lettuce or broccoli, remove the heat immediately once sprouts appear. Warm-season crops such as tomatoes can tolerate heat a little longer, but even then, it’s best to switch off soon after germination. The key is to give your seedlings strong, healthy light rather than prolonged heat. Leaving the heat mat on too long increases the risk of pale, spindly growth and weak stems. Once you see your sprouts, move trays off the heat mat and into bright, indirect light. Keep your process simple: turn off the heat, provide good light, and your seedlings will develop stronger stems and overall healthier growth. For precise monitoring of soil conditions during this transition, consider using a pH meter to ensure your growing medium’s acidity remains optimal for young plants. If you are using peat pellets, note that seedlings can generally stay in them for 2 to 3 weeks after germination before they need to be transplanted. Adding humic acid to your water or soil mix can help seedlings better absorb nutrients and develop stronger root systems during this critical transition.

EFFICIENT & UNIFORM HEAT:Designed by advanced metal heating film technology, this innovative seedling heat mat maintains optimal temperatures around the root zone of your plants in 68-86°F (20-30°C)—the perfect environment for seed germination, enhancing germination rates significantly. Unlike traditional heating wires, the metal heating film provides a more stable and uniform heat distribution, achieving 99% electric heat conversion efficiency.

Professional Thermal Pad Materials: Made of durable PVC and PET film designed to meet MET standards; Far-infrared heating technology facilitates better resistance to high pressure; The IP67-rated waterproof surface is safe to scrub and helps keep the device clean and functioning properly

EFFICIENT & UNIFORM HEAT:Designed by advanced metal heating film technology, this innovative seedling heat mat maintains optimal temperatures around the root zone of your plants in 68-86°F (20-30°C)—the perfect environment for seed germination, enhancing germination rates significantly. Unlike traditional heating wires, the metal heating film provides a more stable and uniform heat distribution, achieving 99% electric heat conversion efficiency.