If you’ve ever wondered whether your moisture meter is giving you reliable readings, you’re not alone. Ensuring accuracy can be tricky, but with a few simple checks, you can keep your device performing its best.
Whether you’re using pin or pinless models, the key is knowing how to verify and calibrate them properly.
The full guide below will walk you through the essential steps.
What Your Moisture Meter Measures and Why Calibration Drifts
Your moisture meter doesn’t directly measure water molecules. Instead, it assesses a stand-in property—either electrical resistance or dielectric constant—then translates that signal into a moisture estimate using a calibration curve built into the device. This indirect approach introduces measurement variability from the start. Factors like the type of material, its density, and dissolved chemicals can alter your readings, making each measurement a modeled guess rather than a precise count. Over time, this estimate drifts. Aging sensors, dust accumulation, and chemical contamination degrade the sensing elements. Temperature fluctuations and rough handling can shift the meter’s response away from its original calibration curve. High humidity environments can even cause permanent changes to the sensor layer. These factors collectively lead to gradual calibration drift, meaning your meter’s readings become less reliable over time—even if the wood or material you’re testing appears unchanged. Choosing the right cutting tool is similar, where an anvil vs. bypass pruners comparison determines which design best suits woody versus green stems. To counteract this, you can periodically perform a salt test calibration to verify and adjust your meter’s accuracy against a known stable humidity standard. Just as micronutrient balance directly affects metabolic efficiency in plants, the presence of dissolved salts and chemicals in your test material can alter the meter’s electrical readings and cause calibration drift.
How to Run a Quick Calibration Check on a Pin Meter
To run a quick calibration check on your pin meter, follow these steps. First, switch the meter to the correct pin mode. Locate the built-in calibration-check contacts or test holes, and insert the pins firmly into these test points. Do not read the value immediately; wait a few seconds for the reading to stabilize.
Compare the displayed value to the calibration standard printed in the manual or on the test standard standard itself. These standards serve as your reference points. To ensure accuracy, follow the test procedures carefully. If the reading is outside the specified tolerance range, the meter may need maintenance or adjustment.
Begin by confirming that the meter powers on and responds correctly when you connect the pins with your fingers to simulate a closed circuit. Inspect the pins for dirt, corrosion, or damage. Weak batteries can cause drift, so replace them if necessary. Set all environmental conditions like wood-species group and temperature—often around 70°F—to typical levels. For reference, a best pH meter for water testing uses similar calibration standards to validate its probes. To ensure consistent readings in growing media, growers often rely on precise nutrient balance to support healthy plant development.
Keep the contact points clean and dry during testing. Repeat the calibration check once more for verification. If the reading still falls outside acceptable limits, consider servicing the meter. When the readings match the standard within tolerance, your calibration is currently accurate and reliable. Unlike flexible ducting, metal duct offers far more durable and stable performance for long-term HVAC installations.

WATER LEAK DETECTOR detects relative moisture content from leaks and flooding

WOOD MOISTURE METER: Prevent water and moisture build-up with our humidity reader. It can quickly determine what level of remediation is needed to keep your family safe. High levels of dampness that go untreated can cause hazardous living conditions.

Dual Measurement Modes: Pin and Pinless measurement options for versatile moisture detection on various materials.
How to Run a Quick Calibration Check on a Pinless Meter
To quickly verify your pinless meter’s accuracy without lab equipment, start with an open-air zero check. Hold the meter in the air with nothing near its sensing plate and expect a low or zero reading, such as 0% or dashes. If you see a value when nothing touches the sensor, the sensor sensitivity may need adjustment. Next, press the meter against a moist area like your forearm and observe the response; a high, clear reading confirms the sensor detects moisture properly. Then, measure a stable reference material like a ream of paper. Repeat readings should remain consistent, showing the meter’s reliability over time. Also, compare readings against known dry reference materials to validate baseline performance. Lastly, use an external check block designed for your model. The meter’s reading should fall within the block’s specified tolerance range. The meter passes this basic check if it reacts in air, jumps when contact is made, and matches the check block’s expected value. A fail indicates the sensor may be misaligned or damaged, or the battery might be too low. Always ensure your battery is sufficiently charged, as low power can skew readings and affect calibration accuracy. For best results, keep the sensor plate clean and dry, similar to how sterilizing perlite removes contaminants that interfere with measurements. Understanding what a meter detects, such as moisture content in building materials, is key to interpreting diagnostic results correctly.
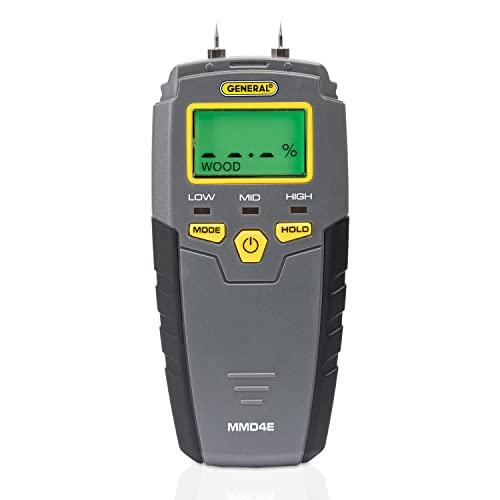
HUMIDITY SENSOR: Our handy meter tool can quickly determine what level of remediation is needed to keep your family safe from black mold. High levels of dampness that go untreated are the leading cause of harmful fungus growth in the home.

𝐀𝐜𝐜𝐮𝐫𝐚𝐭𝐞 & 𝐅𝐚𝐬𝐭: Povlen moisture meter uses advanced sensor technology and a smart chip for accurate moisture detection. It quickly measures moisture content with high-frequency waves and features a HOLD function for one-button recording

Pin-type And Pinless Design - The design of both pin-type and pinless options caters to different user preferences.The pin-type design provides users with specific numerical readings for pinpointed spots, while the pinless design allows users to quickly scan the surface of the object, identifying wet spots.
Check These 5 Calibration-Busting Issues First
Start by identifying a species mismatch. Dielectric meters are sensitive to density differences between species, so selecting the correct species setting is crucial. Using the wrong setting can cause significant errors that mimic calibration failures, but are actually setup issues. Next, examine the surface for contamination—dirt, moisture, or re-wetted areas. These can distort readings, especially on pinless meters, leading to overestimation. Also, verify that your wood temperature matches the meter’s calibration assumptions; a 10°C increase can raise the moisture content reading by about 1.1%. Ensure the probes have good contact—poor contact, corroded pins, or low batteries all compromise accuracy. Similar principles apply when reading a pH meter, where proper probe maintenance is essential for reliable measurements. For hygrometers, placing them away from direct sunlight or drafts prevents skewed readings due to localized temperature changes. Don’t assume the meter is defective; these common issues often cause inconsistent or inaccurate readings. When using a meter on coco coir, remember that proper saturation levels are critical for accurate readings, as overly dry or unevenly wetted coir can distort dielectric measurements.

🌲【Accurate and fast measurements reveal hidden water leaks】: It has 2 high-precision pins that can penetrate the surface to be tested and quickly measure moisture content to estimate potential moisture increase throughout the home. COCZOW moisture meter is the ideal tool for measuring moisture.

Wide measuring range:0~99.9%;Accuracy:± 0.5%,resolution:0.1%

High Accurate Measurement: The wood moisture meter could help you to measure wood by sensitive pins at the range of 0-99.9% and the accuracy is less than ±0.5%.
Confirm Calibration by Comparing Your Meter to Another
To confirm calibration, compare your moisture meter against another more accurate device of the same type and manufacturer. Take multiple readings in nearby spots—two with each meter—to ensure consistency. Look for both the direction and size of any differences; matching readings in both directions suggests your meter is properly calibrated. A steady offset indicates one meter might be misreading, while a large discrepancy points to potential accuracy issues. Avoid mixing pin and pinless meters as reference devices, since their measurement methods differ, as pin moisture meters measure electrical resistance between two electrodes while pinless meters scan with electromagnetic waves. Readings within about 0.1% of each other typically mean your meter is calibrated correctly. If significant disagreement persists, remove the less accurate meter from service. For a simpler and cheaper reference, you can also build a DIY soil pH test kit from common household materials. For hydroponic systems, ensuring your meter is accurate is crucial because ideal pH levels directly affect nutrient absorption and plant health.

Kindly NOTE: This soil tester can not be applied to test pH value of any other liquid. If the soil is too dry the indicator will not move, and water it before testing.

✅ 1Dial & 1 LCD Screen - Replace/install all 3 batteries each time. Put button to %RH/°F to - Turn On, and put to LIGHT to - Turn Off. Read the LCD results in 3-5 mins. (Not Water Moisture Meter, so, please don't test liquid)

How Often to Check Calibration: and Expected Accuracy
After confirming your meter’s current calibration with a comparison test, you should perform re-calibration checks at intervals based on usage and environment. Heavy-use tools or those in harsh conditions need monthly to quarterly testing, while light-use meters can go through annual checks. Physical shocks or exposure to extreme environments require immediate re-checks to maintain accuracy. For gardeners who prefer physical markers, durable metal garden labels offer a long-lasting alternative for tracking plant conditions.
Accuracy expectations vary by meter type and class. Professional-grade devices typically maintain within ±0.5% to ±3% moisture content, whereas budget models may drift up to ±5%. Pin-type meters generally need calibration every 3 to 6 months, while pinless models can be checked every 6 to 12 months. For conductance and dielectric devices, industrial standards historically accept a variance of 0.5 to 1.5 percentage points and 1 to 3 points, respectively. Don’t rely solely on manufacturer claims; if your readings influence critical decisions, consider checking calibration more frequently. Remember that manufacturer-stated accuracy should be viewed as a typical range, not a guaranteed strict limit. Unlike moisture meters, substances like fulvic and humic acid have no standardized accuracy tolerance and their benefits vary widely by source and cost. For those exploring soilless growing, understanding hydroponic system types can help you choose the right setup for consistent moisture management.

pH buffer calibration solution powder accuracy is plus or minus 0.01pH, accurate and precise

High Accuracy: These high-purity buffer powders ensure precise pH calibration with ±0.01 pH accuracy at 25°C/77°F; They keep your pH testers sharp and reliable for consistent results

Easy to use: Mix the buffer powder with 250ML distilled water, put the pH meter into the solution, stir gently, and wait for a few seconds to get the result.