Struggling with knowing when your plants need water? A moisture meter can help you get accurate readings and prevent over- or under-watering.
By inserting the probe correctly and knowing how to interpret the results, you’ll keep your plants healthier and happier.
Here’s how to use a moisture meter effectively and ensure you water your plants just right.
What Exactly Does a Plant Moisture Meter Measure?
A plant moisture meter measures the soil’s electrical resistance to estimate moisture content. It doesn’t detect water directly but gauges how easily an electrical current passes through the soil. Wet soil conducts electricity better, resulting in a lower resistance reading. Drier soil resists the flow, giving a higher resistance measurement. This method is similar to how metal duct offers consistent conductivity, unlike flexible ducting which can impede flow. For example, a humidity dome can be built at home to maintain ideal moisture levels for seedlings during propagation. Building your own soil pH test kit from scratch can similarly help you understand soil conditions for optimal plant health.
Most consumer moisture meters provide a relative scale rather than an exact percentage. The readings indicate whether the soil is dry, moist, or wet, helping you decide when to water. Keep in mind, the meter also responds to soil mineral content. Salts and minerals can alter conductivity, potentially skewing results.
Ultimately, the device tells you about the soil’s electrical behavior, which correlates with moisture but is influenced by soil texture and mineral content. It offers a practical way to avoid overwatering or underwatering by providing a quick, on-the-spot indication of the root zone’s moisture status.

Kindly NOTE: This soil tester can not be applied to test pH value of any other liquid. If the soil is too dry the indicator will not move, and water it before testing.

【4 in 1 function】This is a 4-in-1 multifunctional soil tester.Our soil tester fastly to measure soil moisture, pH, temperature and sunlight to help you take better care of flowers and plants.You can know when you need to water your soil by measuring moisture and pH & Temperature value of the soil and sunlight level of plants with it.

3-in-1 Soil Tester: This meter can test soil moisture, light and pH value; You can switch modes with one button; It makes gardening and plantng more efficient
Where to Place the Probe for the Truest Reading
To get the most accurate moisture reading, place the probe where the roots are actively growing—about halfway between the stem and the pot’s edge. This root zone area provides the most representative moisture level. Surface soil dries faster, which can lead you to overestimate dryness if measured there. For container plants, insert the probe vertically to a depth of half or two-thirds of the pot’s total height. This avoids the dry top layer and reaches the moist, active roots. Unlike a hydrometer which measures liquid density, a hygrometer measures air humidity, which is a related but distinct factor for plant health. For best results, you should also consider the airflow and longevity of your overall plant environment, since proper ventilation supports consistent root health. In larger pots, take 2 to 3 readings around the middle zone to check for uneven moisture distribution. Be careful not to press the probe against the stem or along the pot wall, as these areas can give skewed results. Keeping the probe consistently placed in the same spot each time ensures your readings reflect true moisture changes rather than sampling errors. Using lava rocks as a top dressing can help stabilize soil moisture by reducing surface evaporation around the probe area.

Accurate Soil Moisture Detection: The XLUX Soil Moisture Meter can tell you if the soil deep inside your pot or garden is dry, moist or wet; whereas your eyes and fingers can only determine the moisture level of the soil surface. The probe is 5.5 inches (14 cm) longer than regular styles, allowing it to measure the soil moisture at the bottom of larger and deeper flower pots.

Accurate Soil Moisture Detection: The XLUX Soil Moisture Meter can tell you if the soil deep inside your pot or garden is dry, moist or wet; whereas your eyes and fingers can only determine the moisture level of the soil surface. The probe is 5.5 inches (14 cm) longer than regular styles, allowing it to measure the soil moisture at the bottom of larger and deeper flower pots.
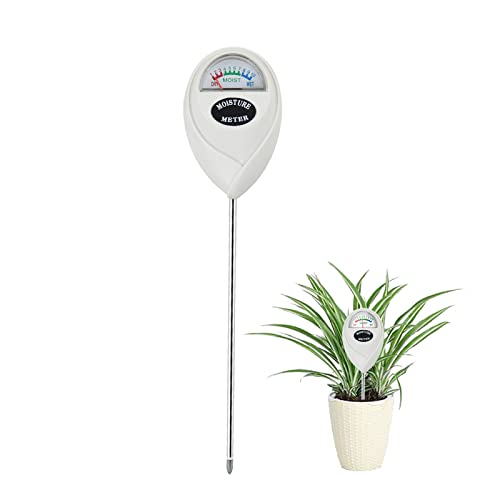
【SAVE YOUR PLANTS】: Over watering can cause problems with your plants or even kill them. This soil moisture meter helps you know the soil is dry, moist or wet.No more over watering!
How Long Should You Wait Before Reading the Dial?
You should wait until the needle or display stops moving before reading your soil moisture level. Most analog meters need about 30 to 60 seconds to stabilize, while some digital models may take just 4 to 6 seconds. Rushing this step can result in a false reading because the moisture level is still changing. For heavy clay soils, it’s best to wait an additional 1 to 2 hours after watering to allow water to distribute evenly. If you’ve recently moved the meter between different environments or experienced a major temperature change, give it up to 30 minutes to stabilize. Always verify that the reading is steady before recording it—it’s the only way to ensure accuracy. For perlite, which is often sterilized effectively by moist heat, a similar waiting period after treatment ensures even moisture distribution. To confirm your meter’s calibration for water testing, check it against a known pH buffer solution before trusting its readings. Perlite is not toxic to humans and is safe for garden use when handled with basic dust precautions.
How to Decode the 1-to-10 Moisture Scale
Once the needle settles, you’ll see a number on the 1-to-10 moisture scale indicating how wet your soil is. A reading of 1 means the soil is bone-dry; 10 means it is saturated. Most moisture meters group these readings into three zones: dry (1-3), moist (4-7), and wet (8-10). Keep in mind that soil type influences accuracy—dense clay retains moisture differently than loose sand—so you may need to adjust your expectations based on soil composition. The single probe design minimizes root disturbance during testing, making it safe for repeated use. For a more hands-on approach, you can build your own tools using a DIY soil blocker to create uniform soil blocks for consistent moisture testing. In contrast, using sharp pruning shears when cutting branches helps prevent plant damage that could affect moisture uptake. Similarly, once seedlings develop their first true leaves, the humidity dome should be gradually removed to prevent damping off and encourage stronger growth.
Calibration ensures your readings are reliable. Always clean your probe before testing, and take measurements in multiple spots to check for consistency. For succulents, aim for a moisture level near 1 or 2, indicating dry soil that’s just enough for their needs. Tropical plants prefer slightly higher readings around 2 to 4. Ferns thrive when the moisture level is between 4 and 5.

Trusted Since 2015: Become one of the many plant lovers who rely on the proven accuracy of XLUX. Established in 2015, our soil moisture meter has earned over 60,000+ verified ratings for its consistent performance. While many many newer brands come and go, we provide the long-term reliability and quality that American households have trusted for over a decade.

Accurate Soil Moisture Detection: The XLUX Soil Moisture Meter detects deep soil moisture in pots or gardens (dry/moist/wet), unlike eyes or fingers that only sense surface soil.
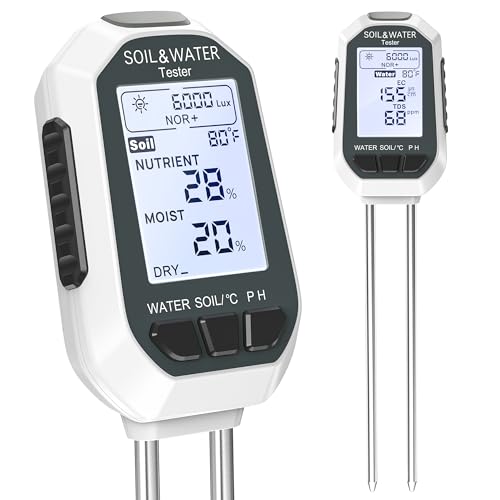
【7-in-1 Features】This is a 7-in-1 multi-function soil tester. Our soil tester quickly measures soil moisture, pH, temperature and light intensity, and its fertility function helps you take better care of your plants. With this device you can measure the soil moisture, pH, temperature and light intensity for your plants and with the EC and TDS functions you will know when it is time to water the soil.
When to Water Each Plant by the Numbers
Using the 1-to-10 scale, you should water succulents and cacti when the meter reads 1 to 2. This low reading indicates the soil is very dry, and overwatering at this stage can lead to root rot. Tropical foliage like monstera requires a slightly higher reading, around 2 to 3, where the top layer of soil has dried out while the lower root zone remains just moist. Calatheas, peace lilies, and ferns need watering when the meter reaches 4 to 5, so they don’t dry out completely but still prefer their soil to be mostly dry between waterings. For orchids in bark mix, aim for a reading of 2 to 3, since bark drains faster and the root zone may dry out quickly; ensure the meter reaches the root zone for accurate readings. Keep in mind that larger pots retain moisture longer, and sandy soils tend to trigger watering earlier than clay soils, which hold moisture more tightly. Garden crops typically use centibars for soil moisture measurement, so adjust your approach accordingly rather than relying solely on the 1-to-10 scale. When your soil consistently reads above 5, consider that activated carbon filters can help manage excess moisture and improve aeration in overly dense potting mixes. Adding the right perlite amount to your mix can similarly improve drainage and prevent waterlogging. For grow tents specifically, selecting a suitable humidifier can further stabilize humidity around your moisture meter readings.
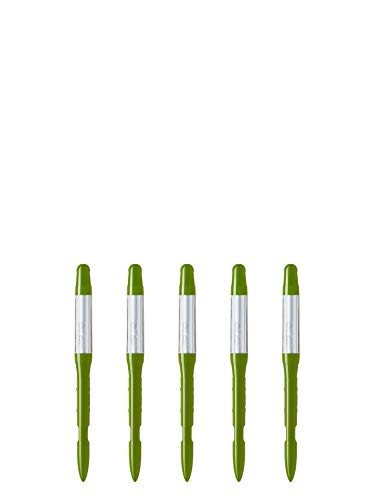
Dimensions: 0.4 x 0.3 x 4.7 inches (small) - Intended for pot sizes of 2, 2.5, and 3 - Ideal for small succulents

Accurate Soil Moisture Detection: Quickly know whether your soil is dry, moist, or wet below the surface. This soil moisture meter provides accurate readings that eyes or fingers alone cannot detect, helping you water plants at the right time

ACCURATE & FAST--- Our analog soil moisture meter delivers precise and fast readings of soil moisture levels, helping you determine the exact watering needs of your plants. With our moisture meter, you can effortlessly maintain the optimal soil moisture level to ensure the healthy growth of your plants. Our device is engineered with advanced technology to provide accurate results in seconds. Invest in our moisture meter to enjoy a hassle-free and efficient gardening experience.
How to Get Consistent Moisture Meter Results Every Time
To get consistent moisture meter results every time, you must standardize your technique across several key variables. First, focus on probe placement—insert the meter to the same depth each session, usually half to two-thirds of the pot’s overall depth, and ensure it’s positioned in the active root zone. Always read from the same location, such as midway between the stem and the pot edge, to avoid moisture variation caused by side-to-side differences. For larger pots, take readings at two or three fixed spots and average those values for more reliable results. If your potting mix contains vermiculite, note that it can retain more moisture than other amendments, so calibrate your watering schedule accordingly. Clean the probe tip thoroughly before each use to prevent residue from affecting accuracy. For indoor setups, it is critical to match soil moisture to plant CO2 levels since proper gas exchange depends on consistent root zone hydration.
Next, control soil consistency. Use the same type of potting mix and maintain a consistent compaction level during each test because different media respond differently to moisture. When inserting the probe, do so vertically and press firmly to ensure good contact with the soil, reducing air gaps that could skew readings. After each use, wipe the probe clean to prevent contamination, and allow the reading to stabilize for 30 to 60 seconds before recording. Keep a detailed log of each measurement to monitor changes over time, reinforcing a routine that makes comparisons accurate and meaningful.

【𝐋𝐚𝐫𝐠𝐞 𝐃𝐢𝐬𝐩𝐥𝐚𝐲】See soil moisture information clearly with a large digital screen designed for easy reading. Quickly check plant needs without bending closer or struggling with small indicators.


✅ 1Dial & 1 LCD Screen - Replace/install all 3 batteries each time. Put button to %RH/°F to - Turn On, and put to LIGHT to - Turn Off. Read the LCD results in 3-5 mins. (Not Water Moisture Meter, so, please don't test liquid)
5 Moisture Meter Mistakes That Give False Readings
Even if your technique is consistent, a few common mistakes can produce false readings with your moisture meter. Testing right after watering can give a falsely high result because surface water masks the drier root zones. This often leads you to skip watering when it’s actually needed. Similarly, only measuring the topsoil can be misleading, making the soil seem drier than it really is. To get a more accurate reading, always probe to about halfway down the pot. For reliable results, it is important to understand what a normal moisture meter reading is for your specific plant type.
Chunky soil mixes with air pockets can disrupt contact between the probe and soil, resulting in artificially low moisture readings. Salty or heavily fertilized soil increases electrical conductivity, which inflates the reading and makes the soil appear wetter than it is. Bent or damaged probes, or poor placement of the meter, also add inconsistent noise to the results.
Remember: don’t rely solely on this tool. Use other methods like inserting your finger or a wooden stick to cross-check the moisture level. If your meter has calibration options, only adjust them if necessary—most analog meters don’t require calibration. Tailor your approach for each pot, and prioritize deeper, more consistent readings over quick surface checks. For cannabis, using a top LED grow light can help ensure even canopy drying, preventing moisture meter confusion from uneven soil evaporation.