If your air stone isn’t producing the full, steady bubbles it used to, you might be dealing with a clog or mineral buildup. Restoring it is simpler than you think and can bring your aeration back to full force.
With just a few common household items, you can clean out debris and mineral deposits to get your air stone working like new. Keep reading to see how you can easily breathe new life into your aquarium’s bubbles.
Why Your Air Stone Loses Bubbles
A clogged air stone produces fewer bubbles because mineral buildup, algae growth, and organic debris gradually block its tiny pores. Hard water deposits calcium and magnesium inside the stone, narrowing the airflow pathways. Biofilm forms on the surface, reducing bubble density, while uneaten food and fish waste can also cause blockages—especially if the stone is near the substrate where debris accumulates. For those starting new cuttings alongside their aquarium setup, choosing a porous medium like perlite can prevent similar blockages in propagation systems.
A weaker bubble stream doesn’t always mean the stone is faulty. Kinked tubing or a weak air pump can mimic a clogged diffuser. Always check your equipment first before considering cleaning methods. Fine-pore stones tend to clog faster because their smaller openings are more prone to blockage, so they require more frequent descaling. If cleaning no longer restores an even bubble pattern, your air stone has likely reached the end of its lifespan. For precise troubleshooting, using a water pH meter can help identify if hard water mineral deposits are the primary cause of the blockage. Regular calibration of your hygrometer ensures accurate humidity readings when testing storage conditions for cleaned equipment.
What You’ll Need to Clean Your Air Stone
To clean your air stone effectively, gather a few supplies beforehand. You’ll need a container large enough to fully submerge the stone, along with fresh or dechlorinated water for rinsing. Select your cleaning agent: distilled white vinegar works well for mineral buildup, diluted bleach targets stubborn algae, and hydrogen peroxide offers a gentler alternative. These options are designed to remove different types of gunk without damaging the stone. For an alternate sterilization method, you can boil the stone in water for up to 30 minutes to kill bacteria and loosen debris, similar to sterilizing perlite effectively. Another cleaning method involves soaking the stone in a diluted bleach solution and then rinsing it thoroughly, which mirrors the process for cleaning LECA balls. Ensuring the stone is fully dry before use can improve accurate readings of porosity and performance.
Also, grab a soft-bristled brush or an old toothbrush for gentle scrubbing. Wearing rubber gloves and safety glasses is recommended when working with chemicals to protect your skin and eyes. A timer helps you control how long the stone soaks, ensuring thorough cleaning without overexposure. Keep a towel nearby for drying the stone afterward. Having a spare stone handy can save you from downtime if your original remains clogged after cleaning.

EXPERTLY CLEAN YOUR AQUARIUM — The biOrb Multi-Cleaning Tool is specifically designed for cleaning all areas of your aquarium. Basic routine maintenance can keep your aquarium clean and clear and its inhabitants happy.

Reaching Narrow Corners: One of the big tough problems with cleaning toilets is getting into all the toilet's nooks and crannies. While the mini disposable toilet brush is designed for fitting tiny gaps between toilet seat and toilet bowl, making easy to sweep away hard-to-reach micro buildup

【Safe for Any Surface】Our groove gap cleaning brush is safe for surfaces of all types, including tile, ceramic, hardwood, stone, glass, granite, quartz, and even those prized marble countertops.and not easy to deform and fall off.
Rinse Off Loose Debris First
Rinsing your air stone before any deeper cleaning is essential to remove surface debris and prevent pushing grime deeper into its tiny pores. First, disconnect the air line and take the stone out of your tank. Hold it under lukewarm or cool running water—hot water can damage the porosity—allowing the gentle flow to wash away surface dirt, algae, and loose particles. Don’t scrub yet; focus on visible buildup only. It’s also a good idea to check the pipe fittings for debris that might clog the connection. A quick flush now makes subsequent cleaning more effective. Avoid using high pressure, as it can stress the fragile ceramic. This initial rinse prepares the stone so that only stubborn residues remain, ensuring strong bubble output after your deeper cleaning. Just as with your air stone, micronutrient balance can be disrupted by improper handling during maintenance. For those maintaining multiple porous items, perlite for succulents requires a similarly gentle rinse to preserve its structure. A gentle rinse is also key when using root stimulators to ensure their active ingredients aren’t washed away before they can benefit the plant.
Soak in Vinegar for Mineral Buildup
To remove mineral buildup, soak the air stone in a vinegar solution. Mix equal parts white vinegar and warm water in a non-metallic container, ensuring the stone is fully submerged. The bubbling you observe indicates the acid reacting with calcium and lime deposits. For light mineral buildup, a soak of 20 to 30 minutes is usually enough. For stubborn scale, leave the stone in the vinegar solution overnight. Different air stone materials may react differently, so always verify compatibility before soaking. Keep in mind that while this method dissolves mineral clogs, it does not disinfect the stone. If you don’t see airflow improve after soaking, try a longer soak or increase the vinegar concentration. After soaking, rinse the air stone thoroughly until the vinegar smell disappears, then check its bubble output to confirm clarity. Submersible water pumps face similar clogs from mineral buildup and benefit from periodic vinegar descaling to maintain flow. Similarly, a DIY vertical hydroponic system often requires cleaning its components to prevent clogs from mineral deposits. For optimal longevity, handle the air stone gently to avoid cracking, as clay pebbles are also fragile when soaked and require careful handling to prevent damage.
Use Bleach or Peroxide for Tough Clogs
For tough clogs that vinegar cannot handle, using a stronger chemical soak can be effective. Start with a diluted bleach bath—mix one part unscented bleach with three parts fresh water. Submerge the air stone in this solution for 24 hours, or up to 48 hours if the clog is severe. The bleach breaks down mineral buildup and disinfects the porous media.
Alternatively, use a 3% hydrogen peroxide soak for organic debris. Soak the stone for 10 to 60 minutes to dissolve stubborn residue and kill bacteria. For a milder approach, mix equal parts peroxide and dechlorinated water. Hydrogen peroxide is gentler than bleach and better suited for algae-related blockages. For serious stubborn residue, consider using a mist sprayer in your grow setup to apply cleaning solutions more evenly across the stone’s surface. To speed up the soaking process, gently agitate the stone in the solution to help dislodge trapped particles from deep within the pores.
Never mix bleach and peroxide together, as this can produce dangerous reactions. After soaking, thoroughly rinse the air stone under running water before reinstalling to remove any residual chemicals.

Dye Free Naturally-Derived Ingredients Non-Toxic Formula
Rinse Your Air Stone of All Residue
After soaking your air stone, rinse it immediately under clean, running water. This step flushes out loosened debris from both the pores and the outer surface. Make sure to rinse the entire stone thoroughly, not just the outside. The tiny pores can trap residues from cleaning agents like vinegar, bleach, or peroxide, so keep rinsing until no chemical smell remains. Warm tap water works well for this purpose. You’ll know you’ve rinsed enough when the water runs clear and no film or smell persists. After rinsing, allow the stone to drain completely before reinstalling or storing it. Rinsing thoroughly is especially important since air stones, much like seedling heat mats used in indoor gardening, rely on unimpeded airflow through tiny pores to function effectively. Notably, ensuring this airflow mimics the way consistent fan performance depends on clean, unobstructed blades to maintain efficiency and longevity. For cacti, excessive moisture levels must be carefully monitored, just as proper air stone function requires precise moisture measurement to avoid root rot.
Test Your Air Stone for Full Bubbles
To test your air stone for full bubbles, place it in a bucket of clean, dechlorinated water and turn on your pump. Observe the bubble output: even and steady bubbling across the entire surface confirms proper function. If you notice gaps or sparse bubbles, the pores are still partially blocked. Pay attention to bubble size—smaller, finer bubbles indicate better dispersion, while large, sporadic bubbles suggest lingering restrictions. Excess salt buildup can also clog the stone, so checking your moisture meter readings for the growing medium helps prevent similar mineral issues. Additionally, using a cal mag supplement can help maintain proper mineral balance and reduce salt buildup in your system.
Check the airflow consistency by observing whether bubbles emerge uniformly from all areas of the stone. If bubbling is concentrated on just one side, the cleaning may be incomplete or the pores unevenly cleared. Before testing, disconnect the stone from the pump to confirm the airflow is strong and the tubing is free of kinks, since weak airflow can mimic blockage. For a more discreet setup, consider hiding your grow tent with easy home solutions.
If bubbling remains uneven or weak, repeat the cleaning process before reinstalling. Your goal is a continuous, balanced column of bubbles with no dead spots, which indicates your air stone is fully restored and operating at optimal performance.
When to Replace Your Air Stone
Most air stones need replacing every 2 to 6 months under normal aquarium use. Cheaper stones may fail in just 1 to 2 months, while higher-quality ones can last 6 months or longer when properly maintained. Watch for signs such as persistent reduced airflow after cleaning, weak or uneven bubbles, visible buildup, or cracks. Hard water can speed up clogging and shorten the stone’s lifespan.
If cleaning temporarily restores performance but airflow remains weak, it’s time to replace the air stone. Aim for a replacement around the 6-month mark as a general guideline. However, in setups with hard water or high use, consider replacing sooner. Poor oxygen transfer can stress your aquatic life, so swapping out the stone when performance drops is essential.
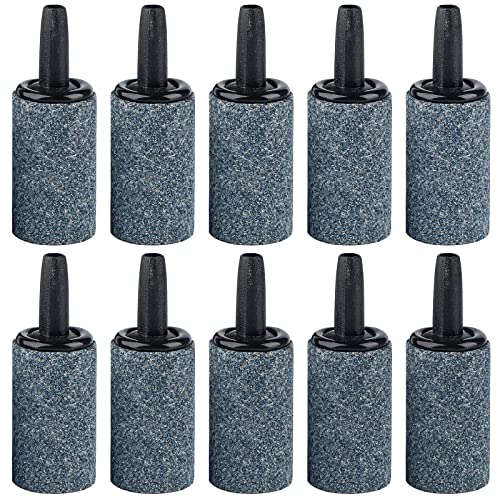
Tiny but Enduring: Each air stone measures 0.6" D x 1" H and weighs 0.3 oz. Tiny but well-constructed for continual bubbling. Ideal for small fish tanks or aquariums.

Widely applicable: suitable for small fish tanks and aquariums, helping extend the life of your nutrient solution

Small Air Stone Disc: Each airstone measures 1.5" D x 0.7" T and weighs 1 oz. Tiny but well-constructed for continual bubbling. Ideal for fish tanks, DWC systems and small ponds.