Starting seeds can seem tricky, but using peat pellets makes the process straightforward and mess-free.
With just a few simple steps, you can give your seedlings a healthy start right at home.
By the end of this, you’ll know exactly how to prepare your peat pellets for successful planting.
What Are Peat Pellets: and Should You Use Them?
Peat pellets are compressed discs of peat moss wrapped in a thin, biodegradable mesh that expand into self-contained seed-starting cells when you add water. They simplify indoor seed starting by reducing mess and minimizing transplant shock—you move the whole pellet intact. However, you need to monitor moisture closely because they dry out faster than loose mix, which means more frequent watering is necessary. When your seedlings are ready for the garden, you can use sharp pruning shears to easily slice open the mesh before planting, just as you would cleanly cut back woody hydrangea stems for healthier growth. Before choosing peat pellets, consider their environmental impact. Harvesting peat moss damages delicate bog ecosystems, making sustainability a concern. If environmental considerations are important to you, explore alternatives like coconut coir pellets or reusable seed-starting trays filled with soil-blocking mixes. Peat pellets are convenient and tidy but can be less ideal if you prioritize eco-friendliness or if you struggle to keep them consistently moist. Compared to loose mixes, pellets also offer less durability and cost efficiency over time, as they break down faster and cost more per seedling than bulk vermiculite or peat blends. For accurate moisture monitoring, you can also use a reliable pH meter to check your water source before hydrating the pellets.
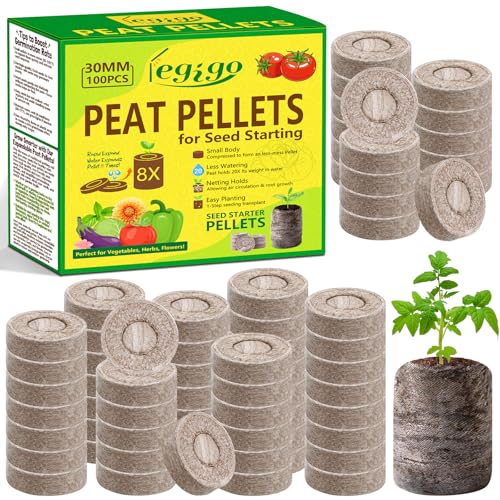
What You Get: Each package includes 100 pcs of 30 mm peat pellets. Just add water, and the seed starter soil will rapidly expand to 8x their original size, forming individual seedling pots. No messy soil prep required, simply place seeds to start growing. Ideal for starting multiple seeds and seedlings, the ample quantity meets daily seedling-growing needs, making seed germination a breeze

Create a self contained pot

Seed starter: Before absorbing water and swelling, the thickness of the peat soil pellet is only 12MM, easy to store and carry. The seedling block is wrapped with a degradable mesh non-woven material, which is convenient for transportation and transplanting. When the seedlings are transplanted, they can be directly planted into the soil to improve the efficiency and success rate of transplanting.
How to Prepare Peat Pellets for Planting
To prepare your peat pellets for planting, start by arranging them upright in a tray with drainage holes, spacing each pellet so they don’t crowd together. Pour about an inch of lukewarm water into the tray to allow the pellets to absorb moisture quickly. Warm water is essential because it helps the pellets rehydrate faster and promotes the release of natural growth hormones. Let the pellets sit for 5 to 10 minutes until they expand fully, become firm, and are evenly moist to the touch. Using hot or boiling water for hydration rapidly inflates the pellets and reduces the risk of fungus gnat issues. Once expanded, drain all excess standing water carefully to prevent soggy pellets, which can restrict air flow and block vital nutrients from reaching the roots. After draining, gently loosen the top layer of each pellet to create a small depression for planting seeds. Ensure they remain damp, resilient, and ready to support your seeds before proceeding. To ensure even moisture distribution, periodically check the pellets and mist any dry spots with a spray bottle, as inconsistent hydration can lead to poor germination. Because the pellets are prone to drying out quickly in warm environments, maintain a consistent moisture level by covering the tray with a clear humidity dome until seeds sprout, checking for potential calibration errors in your watering routine. For best results, refer to top peat pellet reviews to compare different brands and find the ideal option for your needs. For a sterile growing medium, consider steaming perlite as a method to eliminate pathogens before mixing it with your peat pellets.

【Value Package】The kit contain 4 pcs base trays, 4 pcs seed trays with 12 cells in each, 4 pcs humidity lids with dome, and 50 pcs peat pellets, not need soil to fill the cells, help you keep clean and tidy when planting, and creates a moist and warm environment needed for seed germination.

【Value Package】The kit contain 8 pcs base trays, 8 pcs seed trays with 12 cells in each, 8 pcs humidity lids with dome, and 100 pcs peat pellets, not need soil to fill the cells, help you keep clean and tidy when planting, and creates a moist and warm environment needed for seed germination.

Seed starter: Before absorbing water and swelling, the thickness of the peat soil pellet is only 12MM, easy to store and carry. The seedling block is wrapped with a degradable mesh non-woven material, which is convenient for transportation and transplanting. When the seedlings are transplanted, they can be directly planted into the soil to improve the efficiency and success rate of transplanting
How Deep to Sow Seeds and How Many per Pellet
Sow most seeds about two to three times their diameter, which generally means around 1/4 inch deep. This depth ensures good soil contact and enough moisture for germination without burying the seed too deep. Match the planting depth to seed size: tiny seeds like lettuce should be sown on the surface, while medium-sized seeds can be planted at this 1/4-inch depth. Use your finger or a tool to gently poke a shallow hole, then place 2 to 3 seeds per pellet to improve germination odds. Cover the seeds lightly with surrounding peat, avoiding firm packing to prevent suffocation. After they sprout, thin out weaker seedlings, keeping only the strongest ones. Always check your seed packet for specific depth and spacing instructions tailored to each crop. The biodegradable outer mesh allows roots to easily penetrate during transplanting, reducing shock and increasing seedling survival.

100 EASY TO USE PEAT PELLETS: Contains 100 Jiffy 36mm soil pellets—ideal for germinating a wide range of vegetable, herb, and flower seeds indoors.

Package Includes: You will get 100pcs 30mm seed starter pods. Once the seedlings have grown, simply insert the entire seed starter or seedling into an outdoor terrace, deck planter or backyard garden. Since there is no root disturbance, it is easy to build plants. It could't be easier!
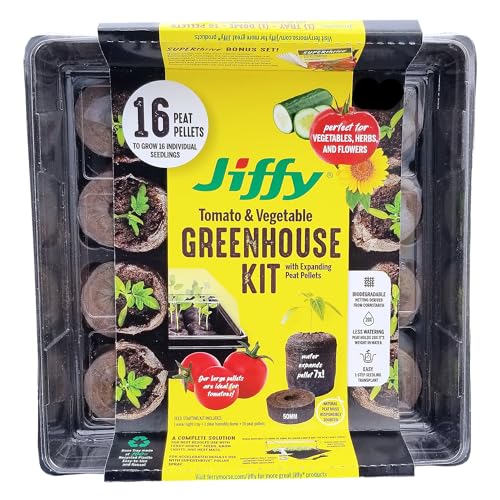
COMPLETE GERMINATION KIT: Includes sixteen 50 mm peat pellets for easy seed starting. Designed for optimal moisture retention and healthy root development in every pellet.
How to Water Peat Pellets Without Drowning Seeds
To water peat pellets without drowning seeds, the key is controlled, gentle hydration. Start by placing the dry pellets in a tray with drainage holes, then add lukewarm water to cover approximately half their height. Let them sit undisturbed for 10 to 15 minutes until they fully expand. Afterward, pour off any excess water to prevent waterlogging, as over-saturation creates anaerobic conditions that can lead to seed rot and damping-off. Unlike lava rock for plants, which provides a highly aerated medium that prevents water retention issues, peat pellets require careful moisture management to avoid over-saturation. Keep medium consistently moist to prevent hydrophobic conditions, which can make dried pellets difficult to re-wet. Choosing a grow box with drainage helps manage water levels effectively. For improved air quality, consider using a carbon filter to control odors during the growing process.
For consistent moisture, use bottom watering as your primary method. Fill the tray with about an inch of water and allow the pellets to wick moisture upward naturally. This helps ensure even hydration and reduces the risk of over-saturating the top layer. Avoid heavy spray bottles or direct overhead watering, as these can cause uneven moisture distribution and lead to drowning.
Check the moisture level daily by feeling the pellets; they should be damp like a wrung-out sponge. When the top surface feels dry or turns a lighter brown, it’s time to add more water. Careful watering promotes healthy seed development and prevents drowning, giving your seedlings the best start.

Organized Cell Design: Separate cells prevent root tangling for easier transplanting and higher survival rates

ALL-IN-ONE SEED STARTING KIT: Includes 36 peat pellets, reusable plastic tray, and humidity dome for a complete indoor seedling starter kit experience

High quality transparent plastic cell trays of this seed grow kit make it easy to observe your plants without interrupting the process.
How Light and Heat Affect Peat Pellet Germination
Heat is the most important factor affecting the speed and uniformity of peat pellet germination. Maintaining soil temperatures around 70–75°F promotes successful sprouting for most seeds. For warm-season crops, aim for temperatures between 80–86°F to encourage quicker germination. Using a heat mat provides bottom heat directly to the root zone, significantly speeding up the process. Consistent warmth is crucial—fluctuations can delay germination or cause uneven growth. Once seedlings emerge, providing bright light immediately is essential. Place grow lights just 4–6 inches above the seedlings and keep them on for 12–14 hours daily to prevent weak, stretched growth. Avoid direct sunlight during germination because it can overheat the covered trays. Maintaining a stable temperature helps reduce stress and pests, supporting healthy seedling development. Always check your seed packet for specific temperature and light requirements to optimize germination success. To support later transplant growth, remember that tomato plants also rely on essential nutrients such as nitrogen, phosphorus, and potassium for healthy development.
How to Thin Seedlings in Peat Pellets
When multiple seeds sprout in a single peat pellet, you should thin them down to just one strong seedling. Wait until true leaves appear, typically when the seedling reaches around 2 to 3 inches tall. At this point, you can clearly identify the toughest stem. Instead of pulling out the weaker seedlings, use manicure scissors to snip them at the soil line. Pulling can disturb the roots and potentially invite pests or stunt the growth of the remaining seedling.
Select the seedling with the thickest, healthiest stem and best overall vigor. Removing weaker competitors allows the surviving seedling to absorb more light and nutrients, promoting stronger growth. After thinning, water the pellet gently to settle the soil and reduce stress for the remaining seedling. Keep the peat pellet evenly moist, so the single seedling can focus on developing a robust root system without unnecessary competition. Commercial growers often supplement with hydroponic nutrients to accelerate early root development. Using a moisture meter can help ensure the peat pellet stays at the ideal moisture level for healthy root development. For accurate readings, insert the probe of the moisture meter into the center of the pellet and check the moisture scale to confirm the medium is neither too wet nor too dry.
How to Transplant Peat Pellets Into Soil
To transplant peat pellets into soil, ensure they are fully expanded and moist but not soggy or dry. Look for visible roots through the mesh or the development of 3 to 4 leaf sets, indicating the seedling is ready to be moved. Gently tear the top of the mesh to help roots emerge more easily, but keep the root ball intact to avoid damaging the plant. Before transplanting, you can check the EC meter readings to confirm the nutrient levels in the pellet are balanced for healthy growth. To optimize seedling strength, consider using hydroponic nutrient solutions during this stage for an extra boost. When preparing the planting site, dig a hole slightly deeper than the pellet’s height to accommodate the root system comfortably. Place the pellet into the hole without squeezing or compacting it. Fill the space around the pellet with loose soil, ensuring the entire pellet is covered but the crown remains above soil level to prevent rot. For pest prevention, backfill with moist, loose soil and lightly firm it to eliminate air pockets, which can make the seedling more vulnerable to pests. Finish by watering immediately with room-temperature water to settle the soil around the roots and maintain consistent moisture during early growth. For best results, also confirm that the relative humidity around the seedlings stays stable to support healthy root development after transplanting.

Package Includes: You will get 55pcs 30mm seed starter pods. Once the seedlings have grown, simply insert the entire seed starter or seedling into an outdoor terrace, deck planter or backyard garden. Since there is no root disturbance, it is easy to build plants. It could't be easier!

🌱 COMPLETE 10-PIECE KIT — Everything you need to start seeds in one box: 10 biodegradable peat pots, 10 expandable coco coir soil discs, and 10 plant markers. Just add water and sow — no extra supplies needed for herbs, vegetables, or flowers.

Package Includes: You will get 200pcs 30mm seed starter pods. Once the seedlings have grown, simply insert the entire seed starter or seedling into an outdoor terrace, deck planter or backyard garden. Since there is no root disturbance, it is easy to build plants. It could't be easier!
Common Mistakes to Avoid With Peat Pellets
To avoid common mistakes with peat pellets, focus on moisture control. Overwatering is a primary concern; leaving pellets in standing water after hydration creates poor drainage and soggy conditions. This excess moisture reduces oxygen around the roots, increasing the risk of rot and seedling diseases like damping off. To prevent this, bottom watering and fully draining the pellets before sowing are essential steps. Unlike clay pebbles, which provide excellent aeration and drainage for root systems in hydroponic setups, peat pellets retain water more readily and require careful management. For hydroponic use, maintaining a balanced pH level is critical to ensure nutrient uptake by the delicate young roots.
After germination, don’t leave the humidity dome on for too long. Extended use traps excess humidity, which can promote mold and fungus growth. As soon as seedlings emerge, increase airflow by removing or slightly propping open the dome.
Conversely, peat pellets can dry out quickly under grow lights, which can hinder germination and stunt young growth. Regularly monitor the surface texture and weight of the pellets; when they feel light or the top appears dry, it’s time to water. Avoid letting them dry out completely.
Finally, provide bright light immediately after sprouting to prevent seedlings from becoming leggy and weak. Remember, peat pellets lack nutrients, and seed reserves typically last only 2 to 4 weeks. Be prepared to transplant or start feeding early to support healthy growth. Additionally, before transplanting, you must remove the outer netting from each pellet, as this non-biodegradable covering can restrict root expansion and persist in the soil for years.
Are Peat Pellets Right for Your Garden?
Peat pellets can be a good choice if you prioritize ease and quick setup, but they come with notable drawbacks. They are convenient because you don’t need to mix soil—just add water to expand them. However, they tend to dry out quickly, requiring frequent watering, which can be a hassle. Overwatering can lead to mold growth and make pest management more difficult. Their uniform appearance appeals visually, but because they have limited root space, they are best suited for fast-growing crops like lettuce rather than larger plants such as tomatoes that require longer indoor starts. Sustainability is another concern, as peat harvesting harms the environment, making these pellets less eco-friendly. To accurately gauge when to water these pellets before roots dry out, you can use a moisture meter to monitor soil moisture levels. Additionally, delaying transplanting can cause the roots to bind within the mesh, which may hinder plant growth, and the mesh itself might not fully decompose. For an alternative with better water retention and eco-friendly credentials, consider coco coir which is a renewable byproduct. Weigh these factors against the garden benefits and your eco-values before choosing peat pellets.