Struggling to prepare your coco coir for healthy seedlings? Buffering it correctly helps prevent nutrient lockout and ensures your plants get essential calcium and magnesium.
By following a simple Cal-Mag soaking method, you can set up your coir for success from the start. Keep reading for the full step-by-step process to get it just right.
Why Buffering Coco Coir Matters for Strong Seedlings
Buffer your coco coir before planting because seedlings are extremely sensitive to early nutrient imbalances. Unbuffered coir tends to bind calcium and magnesium on its exchange sites, preventing your seedlings from accessing these vital nutrients. This creates a nutrient imbalance that can stunt growth well before you see visible signs of trouble. You might notice weak new growth, damaged root tips, and stalled development. The lack of calcium and magnesium immediately hampers root development, which is crucial in the early stages. Buffering pre-loads the medium with these essential cations, ensuring your young roots can absorb them reliably from the start. A buffered medium also minimizes sudden nutrient fluctuations, fostering a stable root zone. This stability helps prevent early lockout and supports the establishment of strong, uniform root systems. Using a pH meter for water to monitor your solution’s acidity during the buffering process ensures the coir’s cation exchange sites are fully saturated for optimal uptake. As a result, your seedlings are set up for vigorous, predictable growth throughout the entire crop cycle.
What You’ll Need to Buffer Coco Coir
To buffer your coco coir, you need several essential supplies. Start with a Cal-Mag supplement—either a liquid product like General Hydroponics CaliMagic, using 7.5 to 15 milliliters per gallon, or dry salts such as 14 grams of calcium nitrate combined with 4 grams of magnesium sulfate per 5 gallons of water. The goal is to achieve a nutrient solution with 150 to 200 parts per million of calcium and magnesium. You’ll also need clean water and a mixing container large enough to fully submerge your coconut husk medium. CO2 monitors can help verify that ventilation is adequate during this indoor process. For a more economical setup, you can build a DIY mushroom grow tent to control the environment during buffering. Unlike pumice, which typically needs replacement every few years, lava rock lasts much longer in hydroponic systems.
Before buffering, ensure your dry coco coir—whether bricks or loose—is thoroughly wetted. Use a measuring spoon or a scale for accurate dosing of supplements. An EC meter is useful to verify the solution’s electrical conductivity, aiming for a range of 1200 to 2000 microsiemens per centimeter. To keep the solution at the correct pH level, have pH testing tools on hand, targeting a pH of 5.8 to 6.2. Lastly, gather a fabric pot or a bucket with drainage holes to help separate and drain spent buffering solution from the media once buffering is complete.

Calcium & Magnesium Support – Formulated to supply essential nutrients for balanced plant nutrition

Supports Plant Strength & Development – Helps encourage steady growth and healthy plant structure.

THRIVE WITH KEY NUTRIENTS: This cal-mag for plants provides a vital supplement to combat calcium and magnesium deficiencies. Ensure your plants have the nutrients they need help prevent blossom end rot and tip burn
Step 1: Rehydrate and Rinse Your Coco Coir
To rehydrate your coco coir, start by placing the compressed brick or loose material into a large tub or bucket that can accommodate its expansion. Gradually add warm water, giving the fibers time to absorb without creating dry pockets. Use your hands to break apart any clumps until the coir becomes light and fluffy. This step not only ensures even hydration but also helps with pest control by drowning possible insects.
Next, rinse the expanded coir multiple times with plain water. This process helps remove fine dust and loose particles that can decrease air space in your medium. Use a mesh strainer or fabric pot to make rinsing easier, and continue until the runoff runs clear. For optimal environmental control during this phase, consider using a variable speed controller to maintain consistent airflow across the drying medium. Check the electrical conductivity (EC) and aim for a level below 0.5 to 1.0 mS/cm to flush out soluble salts. You can also apply a similar steam sterilization technique to ensure any remaining pathogens are neutralized. A balanced intake of both macro and micro nutrients is essential to maximize performance and results in your growing medium. Finally, allow the coir to drain thoroughly, ensuring excess water is removed for even buffer absorption in the next steps.

Pre-Rinsed & Pre-Screened Coco Coir - Every block of our coconut fiber substrate has been screened multiple times through an extremely small filter to get rid of any traces of fiber, sand, and rocks. This is what sets our coco coir apart, giving you pure and clean coco coir for plants, unlike others who don’t filter their coco coir for impurities.

🌴 ORGANIC COCONUT COIR - Perfect Plants Organic Coconut Garden Coir Comes with A Lot of Benefits. Great for Water Retention, Growing Seedlings, Holding Nutrients, and Creating Potting Mix. Decomposes at a Slow Rate, Lasting Longer in the Soil.

12-Pack Compressed Bricks: This package contains 12 bricks; each brick measures 7.8" x 4" x 1.5" (20 x 10 x 3.7 cm), with an individual weight ranging from 300 g / 0.66 lb to 400 g / 0.88 lb ; the final weight may vary as it is influenced by the product's moisture content, which can change during storage and transit
Step 2: Mix the Perfect Cal-Mag Buffer Solution
Once your coco coir is rinsed and draining, you need to prepare a Cal-Mag buffer solution to properly charge those exchange sites. Aim for a combined calcium and magnesium level of 150 to 200 ppm, using about 5 to 10 milliliters of liquid Cal-Mag per gallon of water. If you prefer dry salts, dissolve 14 grams of calcium nitrate and 4 grams of magnesium sulfate in 5 gallons of water. This ensures the correct nutrient balance and helps prevent deficiencies later on. For precise cuts during the mixing process, consider using best pruning shears to open bags of dry salts or cut measuring tools free of debris. After mixing, set the pH to between 5.8 and 6.2—do this after combining your solutions, not beforehand, to keep the mixture stable. Use clean water heated between 18 and 25 degrees Celsius for best results. To verify your target ppm is accurate, use an EC meter to measure the electrical conductivity of the solution. Prepare enough solution to fully saturate your coir; roughly one gallon of Cal-Mag buffer per gallon of expanded coir is recommended. Stir the solution thoroughly until all salts are fully dissolved. Once complete, your coco coir is ready for planting or further nutrient adjustments. This buffering process is critical because coco coir naturally resists decomposition when properly charged.

CALiMAGic 1-0-0 is a concentrated blend of readily available calcium and magnesium

Highly fortified calcium, magnesium, and iron plant supplement formulated to correct common deficiencies

Easy Mixing Directions: Simply add 2-5ml per gallon of feedwater, then water your plants as you normally would. A straightforward addition to your plant care routine, suited for all types of plants.
Step 3: Soak Your Coco Coir for the Right Amount of Time
You should soak your coco coir for 8 to 24 hours after mixing it with a Cal-Mag buffer. Raw or compressed bricks typically need the full 24 hours for complete saturation, while washed or pre-buffered coco might be ready after an overnight soak. Fully submerge the coco in the buffer solution to ensure thorough calcium-magnesium exchange. Avoid partial wetting or shorter soak times because under 8 hours can lead to incomplete buffering, which may cause potassium deficiency later as exchange sites remain occupied by sodium. For the best results, consider the top options when selecting your coco chips for optimal plant growth. Indoor growers rely on pruning shears to precisely trim roots and leaves during the coco preparation process. Using peat pellets at home provides an alternative media that expands upon soaking for easy seedling starting.
Longer soaking times, especially for raw bricks, improve pH stability by allowing the buffer to fully occupy the cation exchange capacity. Keep the coco fully submerged during the entire soak; partial wetting isn’t effective. Measure your soak duration only after confirming the coco has reached full saturation, not before. For pre-buffered coco, an overnight soak is typically sufficient to achieve proper buffering and readiness for planting.
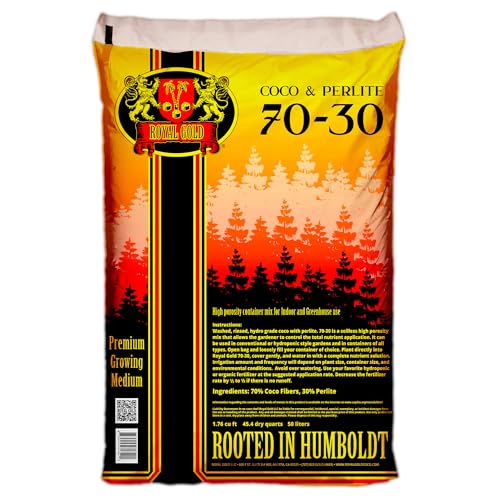
Rinsed, buffered, processed, and packaged, this Coco-Perlite mix is ready right out of the bag for immediate use, eliminating the need for preparation.

Coco Coir Growing Medium: This low EC, PH balanced biodegradable soil is made from crude fiber extracted from the husk on coconut coir, 100% natural organic and sustainable, a traditional soil alternative, it can take your gardening and planting efforts to a new level; 4 Pack, each coir brick is: 8 x 4 x 2 inches, weight 1.4 lb
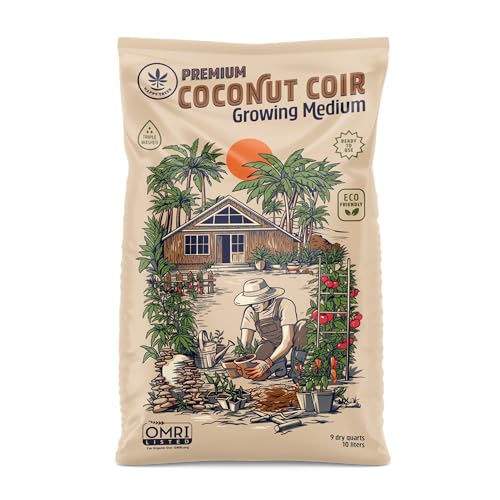
DITCH THE DIRT: Happy Trees Coconut Coir is an absolute pleasure to garden with. It's pleasant to handle with low dust and a fresh aroma. Its soft fluffy texture is suitable for cultivation because of its ability to retain moisture without becoming saturated. It's also airy and light, giving plants an ease of growth that's impossible to achieve with any other medium. Once you and your plants feel it, you'll never want to deal with conventional soils again
Step 4: Drain and Prepare Your Buffered Coco Coir
Once the full soak time is complete, drain the buffering solution thoroughly from your coco coir. Use a container with drainage holes to allow excess liquid to flow out freely. If you’re working with a large volume, stage the draining process in batches to ensure even flow and prevent oversaturation. After draining, rinse the coir with fresh water to remove any residual salts and buffer remnants. Agitate the coir during rinsing to dislodge trapped salts until the runoff is clear. To verify the final moisture level, use a moisture meter to confirm field capacity before moving on. Next, focus on temperature regulation. Keep the coir at a stable, moderate temperature to prevent stress that could affect its properties. Avoid squeezing or compacting the coir, as this can reduce airflow and negatively impact water retention. Fluff the coir to achieve a moist, airy texture, which supports better nutrient balance later. Once prepared, transfer the coco to your grow container. It will now be at field-capacity moisture level, ready for planting without requiring additional adjustments.

Accurate Soil Moisture Detection: The XLUX Soil Moisture Meter can tell you if the soil deep inside your pot or garden is dry, moist or wet; whereas your eyes and fingers can only determine the moisture level of the soil surface. The probe is 5.5 inches (14 cm) longer than regular styles, allowing it to measure the soil moisture at the bottom of larger and deeper flower pots.

Kindly NOTE: This soil tester can not be applied to test pH value of any other liquid. If the soil is too dry the indicator will not move, and water it before testing.

DUAL PROBES VS. A SINGLE PROBE—WHY IT MATTERS. Typical single-probe meters read mainly from one small point in the soil, so a wet pocket or dry patch can strongly influence the result. EVO10 uses two separated stainless-steel probes to measure across a wider root-zone area, helping provide more stable and representative soil moisture readings.
How to Test Your Buffered Coco Coir
Calibrated pH and EC meters are essential to accurately test whether your buffered coco coir is ready for planting. For pH, aim for a runoff range of 5.8 to 6.5. If your readings fall below 5.5 or rise above 7.0, it indicates your buffering process needs adjustment. Regularly clean your pH probe after each use to prevent contamination and store it properly to avoid drift, ensuring reliable measurements over time. Using a best PAR meter alongside your pH and EC tools can also help verify that your plants receive optimal light conditions for healthy growth once planted. Bypass pruning shears are a common tool for trimming plants in coco coir, as their clean cuts reduce stress on the plant stems. To further optimize the root environment, consider pairing your buffered coco with the best perlite for improved drainage and aeration.
For EC testing, saturate a sample of coco coir with distilled water and collect the runoff. Use an EC meter to measure the electrical conductivity. Acceptable EC levels should be below 0.6 milliSiemens per centimeter (mS/cm). If readings exceed 1.0 mS/cm, it signals an excess of salts that could harm plants. Always test multiple spots within the same batch to verify consistency, and compare the runoff readings to your input water to assess salt buildup.
5 Common Coco Coir Buffering Mistakes (and How to Fix Them)
Skipping the pre-buffer soak is a common mistake that can lead to nutrient deficiencies. Without this step, your coir media may steal calcium from your feed, causing early calcium deficiency in your plants. Coco coir is a viable soil alternative, but only if properly prepared. Investing in a pair of bypass pruning shears ensures clean, accurate cuts for all your gardening tasks. To avoid this, always saturate your dry coco in a Cal-Mag solution for 8 to 24 hours before planting. This process ensures the media is properly conditioned and helps maintain nutrient balance throughout your grow. For precision tasks like trimming roots before planting, using high-quality pruning shears ensures clean cuts that prevent damage to the delicate root system.