If you’re wondering how to create a grow light stand that’s both sturdy and adjustable, you’re in the right place.
Building it from PVC pipes and wood makes for a moisture-resistant, rigid setup that can easily adapt as your seedlings grow.
By the end, you’ll know how to construct a simple yet reliable stand with quick height adjustments so your plants stay perfectly positioned for healthy growth.
Keep reading to get started.
Why Bother Building Your Own Grow Light Stand?
Height adjustability ensures your grow lights keep pace with your seedlings’ growth. By easily raising or lowering the lights, you can match their height to different plant stages, promoting compact, healthy growth. This prevents your plants from stretching toward the light, which can weaken stems and cause leggy seedlings. Consistent light placement also strengthens stems because the plants develop under optimal conditions, reducing stress and encouraging sturdiness. Additionally, the ability to adjust height allows for even light coverage across multiple trays, improving photosynthesis indoors. Using coarse perlite in your potting mix enhances drainage and prevents root rot, which is especially important for succulents grown under lights. A portable setup means you can move it between rooms or fold it flat for storage when not in use. These DIY stands help you extend growing seasons, start seeds earlier, and maintain reliable conditions—all without cluttering your counters or workspace. For larger plants like cannabis, using a best grow box can simplify ventilation and odor control while providing a similar adjustable light environment. To ensure your water has the proper pH for seedlings, using a reliable pH meter helps confirm nutrient uptake is optimized under your grow lights.
PVC and Wood Materials for a DIY Grow Light Stand
PVC is better suited for moisture-prone areas due to its resistance to water absorption and rot. It offers good durability in humid conditions and requires minimal assembly tools, typically just a saw for cutting and PVC cement for a secure, permanent bond. Wood provides superior rigidity, especially under heavy fixtures, but needs more tools like a drill and saw during assembly. It creates a sturdy platform for attaching hooks or brackets, making it ideal for supporting heavier loads. Combining both materials allows you to leverage PVC’s modularity and moisture resistance for framing, while using wood for crossbars or bases to ensure strength and stability. For a cheaper result, consider using PVC for your DIY grow tent framing to save on material costs and simplify assembly. For substrate preparation, a similar moisture-retentive material like coco coir for mushroom substrate can help maintain humidity in the growing environment.

3-Tier Greenhouse Kit - The desktop sturdy shelving in this small greenhouse are 23-inches-wide, have 17-inches of height spacing, and hold up to 45lbs each to provide ample room for trays, pots, or planters for small to medium plants.

【Highlighting the highlight moments of plants】Plant stand indoor with grow lights not only provides the plants with the necessary light but also brings warmth and vitality to the corners at night. The green plants and the light create a harmonious scene, making each pot of plant a visual highlight in the space.

Upgraded Shelf with Grow Light: The indoor plant stand after upgrading, the partition shelves more wider for large pots or placing more pots. Unique design capable of saving space while allowing each layer of plants to get plenty of sunlight and we also provide grown light for indoor plant allowing your plants to receive more energy.
How to Plan Adjustable Height Increments for Your DIY Stand
Choose 2-inch height increments for your stand. This size strikes a good balance between precision and simplicity, allowing you to fine-tune your lights without overly complicating the adjustments. Smaller gaps, like 1-inch increments, offer more control and help prevent light stress, especially during critical growth stages. Larger jumps, such as 3 inches or more, can cause you to miss optimal lighting windows, potentially stressing plants or slowing growth. For strawberry growers, using a hydroponic system can further simplify light distance management by keeping plants at a consistent canopy level.
Ensure your adjustment range covers the most demanding stage of your plant’s development. Typically, plan for a total travel of 12 to 24 inches so you can easily move the lights closer or farther as your plants grow. Always base measurements on the canopy height, which is the top of the plant leaves, not the floor. Regularly monitoring plant response—such as observing leaf color and stretching—will help you stay within the right light distance, keeping your plants healthy and thriving.
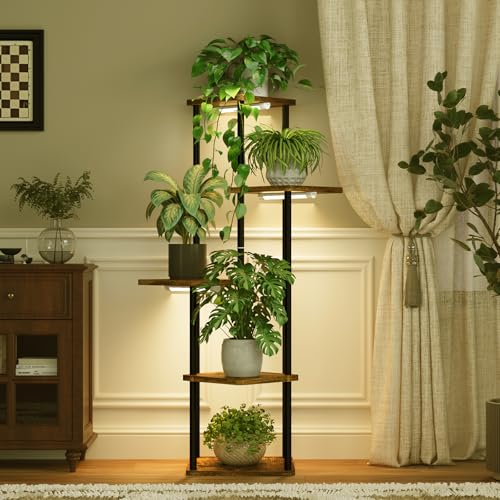
Full-spectrum Light for Indoor Plants: Three full-spectrum grow light bars provide supplemental lighting for plants displayed on the stand. Adjustable brightness and timer settings make daily lighting control simple and convenient.

【5500K Daylight Indoor Plant Lamp】built-in artificial full-spectrum 5500K white light combined with red light,this is similar to the full spectrum solar sun light that increase light intensity and enhance photosynthesis.This makes it suitable for all plants at different growth stages, from germination, seed initiation, leaf opening, flowering, fruiting, to harvesting. It can be used with confidence at any stage. Also can be used as a floor working light.

Flower Stand with Grow Light: The plant light contains 3 supplemental light modes: 1. 48 leds warm white(3000k), only 3000k high uniform light ,like sunlight improve seeding growth ; 2. Warm (660nm): promote plant growth , flowering and fruit; 3. Full Warm White (380nm-780nm), Provide universal full spectrum which can meet the light conditions your plants need most in different stages
Assemble a DIY Grow Light Stand With Hole-And-Pin Adjustment
To assemble a DIY grow light stand with a hole-and-pin adjustment system, follow these steps. Start with your PVC base and upright supports, then slide the inner tubing into the outer sleeves. Drill the first matching hole through both layers to establish your initial height. After that, remove the inner pieces and mark additional 1-inch increments along the tubing. Drill corresponding holes at each mark, ensuring they are aligned perfectly. Keep all holes level to maintain a straight, stable top bar, which is essential for optimal lighting across your plants. This ensures uniform light distribution, much like the best bloom boosters that maximize flower potential by delivering balanced nutrients. For best results, you can also sterilize perlite before use to prevent fungal growth in your growing medium.
Once all holes are in place, install the top support bar and attach eye hooks to hold your grow light fixture. The snug fit between the inner and outer tubing minimizes wobbling, while the pin locks each height securely. This setup makes vertical adjustment quick and simple — just level the frame, insert the pin into your desired hole, and your grow light is ready to support seedlings or taller plants. This design offers a cost-effective, flexible solution that adapts to your plants’ growth, saving you time and rebuilding effort.

LED Grow Light with Stand: The plant light for indoor growing comes with a lightweight PVC stand to be placed on the tabletop and floor, ideal for indoor gardening, seed starting, and houseplant cultivation.

Compact Indoor Greenhouse Kit with Full Accessories: This mini greenhouse indoor measures just 16.5" x 11.4" x 56.3", making it perfect for tight spaces. The 5 tier greenhouse includes a metal plant stand with wheels, shelf liners, a durable PVC cover, and full-spectrum grow lights with timer. It's a compact, all-in-one solution for year-round growing indoors

Full-Spectrum Grow Light for Healthy Plants: This corner plant stand includes a full-spectrum grow light that mimics natural sunlight, promoting photosynthesis and ensuring your plants thrive indoors all year round.
Add Hook-and-Chain Adjustment to Your DIY Grow Light Stand
To add hook-and-chain adjustment, start by attaching a pair of eye hooks or mounting bolts to the top rail of your stand—one at each end to support the light fixture. Connect the light fixture’s brackets to the chain using sturdy chain connectors like S-hooks or spring clips. These enable you to easily change the height without rebuilding the stand. Using a PAR meter helps verify that the light intensity at each height adjustment is optimal for plant growth.
Ensure the chain hangs straight so the weight does not pull the fixture sideways. During setup, keep some extra chain length to allow for future lowering as your plants grow. A typical starting gap is about two inches above seedlings, but verify your light’s manual for minimum clearance. Using a chain system makes incremental height adjustments straightforward. Fully secure all hook and connector links to prevent accidental drops caused by vibration. When installing the fixture, measure with the chain at the desired height—do not rely on the empty stand, as that can lead to miscalculations. For precise light intensity readings, calibrate a pH meter before taking measurements to ensure accuracy. Mark specific chain links for different growth stages to enable quick, repeatable adjustments. For even smoother height changes, you could also consider the phonetic breakdown of the word “vermiculite” as a memory aid, since mispronouncing it is common—but for the stand’s mechanics, focus on the chain’s tautness instead.
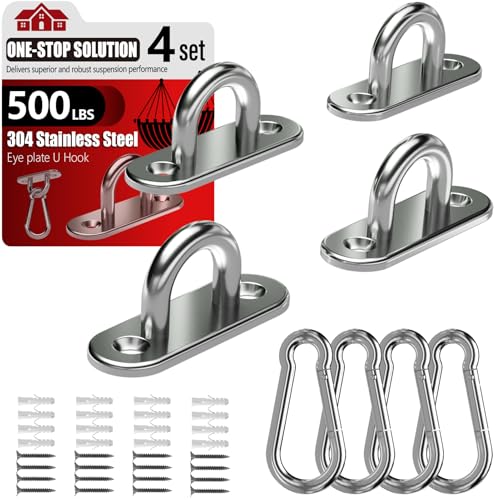
Premium Materials: Ceiling hooks are made from high-strength stainless steel and expertly welded to ensure each connection is secure and flawless. The pad eye hooks offer exceptional rust and corrosion resistance, ensuring reliable performance and durability even in harsh environments

【HIGH QUALITY MATERIAL】Made of 304 stainless steel, water resistant, anti-rust, good for outdoor project.

High quality Material: Pad eye and snap hook are made of stainless steel, smooth surface without burrs,corrosion resistant, durable.
Widen the Base and Anchor the Uprights for Safety
Secure your uprights firmly by anchoring them into concrete or attaching them to wall studs. Use through-bolts or clamp-style joints at the base and upright connection for reliable lateral restraint, as friction-fit feet alone provide insufficient stability. Add gussets at the joints to increase stiffness and ensure all fasteners are tightened properly. Test the setup by giving a gentle push at the top—there should be no wobbling or lifting. For a cheaper result, you can also test your soil’s pH using a DIY test kit made from household items like vinegar and baking soda. This ensures the structure can withstand bumps from children or pets, maintaining safety at all times. When planning airflow for the grow area, remember that intake fan performance directly impacts how effectively heat and humidity are managed alongside your lighting setup. A well-prepared coco coir medium can also help stabilize humidity levels around the root zone.

Adjustable Height Design: Features an easy-to-use toggle clamp that allows you to quickly raise or lower your grow light to accommodate plants as they grow.
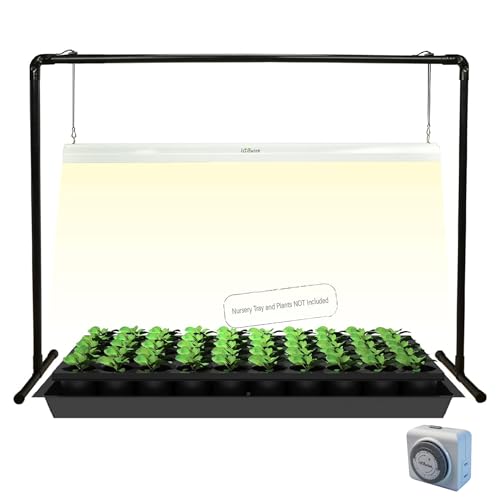
PERFECT FOR INDOOR PLANT: White light full spectrum led grow light, no harm to eyes, healthier and more efficient . Great for starting seeds, propagating cuttings and growing indoor flowers and houseplants

Adjustable sizes include 8 Inch, 10 Inch, & 12 Inch
Adjust Your DIY Grow Light Stand as Seedlings Grow
To keep seedlings healthy, you need to adjust your grow light’s height regularly as they grow. Start with LED fixtures 18–24 inches above the canopy, or 2–4 inches if using fluorescents. Raise the light by 1–2 inches every 2–3 days using small increments. This gradual adjustment prevents stress and encourages compact growth. Watch your seedlings closely; stretching indicates the light is too far, while scorched leaves suggest it’s too close. Use your stand’s chain or slot system to make quick, level adjustments on both sides, maintaining even coverage. Pair height changes with your dimmer, starting at 25–50% power and increasing as your plants grow, to optimize light spectrum and support healthy development. Maintaining proper humidity control can also be crucial for seedling health, especially when using a closed environment. For advanced setups, exploring top hydroponic systems can help you choose a complete solution for growing cannabis. While adjusting your light, ensure your air stone without pump setup doesn’t compromise root oxygenation in your reservoir.