Building your own grow tent can save you hundreds compared to buying a store-bought one.
With some simple materials and a little know-how, you can customize the size, ventilation, and light setup to fit your space.
This guide will show you how to choose the right materials and avoid costly mistakes so you can start growing smarter and cheaper.
Why Build a DIY Grow Tent Instead of Buying One?
Building your own grow tent allows you to customize every inch to fit your available space. Whether it’s a corner, closet, or basement, you can design a setup that maximizes your area without wasting room. Commercial grow tents come in fixed sizes, which often leave unused space or create awkward gaps. By constructing your own, you can precisely position vents, lights, and fans where they’re needed most, improving airflow and light efficiency. This control makes it easier to train your plants because you can optimize lighting angles and trellis support tailored to your plant’s growth stages.
You also gain easier access to your soil and plants. Designing your own grow tent means you can incorporate walkways, shelves, or removable panels that streamline watering, mixing nutrients, and monitoring conditions. Managing temperature and humidity becomes more straightforward because you can incorporate custom ventilation and insulation specific to your environment. Plus, upgrading components—like swapping out a fan or adding a new light—is simpler because you build your setup incrementally. This flexibility not only saves money but results in a smarter, more adaptable environment that responds quickly to your plants’ needs. Using a reliable pH meter helps ensure your nutrient solution stays in the optimal range for healthy plant growth. For soil-free setups, sterilizing perlite effectively prevents pathogens and ensures a clean starting medium for your plants.
How Much Can You Save With a DIY Grow Tent?
Building a DIY grow tent can save you between $5 and over $329 compared to retail models. The amount you save depends largely on the size and materials you choose. For larger enclosures, such as 4×4 feet or bigger, the savings are more significant, with retail branded tents costing between $200 and $359. In contrast, your DIY version might only cost between $30 and $75, making it a cost-effective option. To achieve the best results while pruning your plants, select best pruning shears for hydrangeas to ensure clean cuts that promote healthy growth. To further optimize your grow environment, consider incorporating a reliable CO2 monitor to track indoor air quality and boost plant growth. Adding perlite to your succulent soil mix improves drainage and prevents root rot, just as a well-ventilated tent prevents mold.
Material durability greatly influences the overall savings; repurposing frames and relying on common supplies like plastic sheeting or painter’s tarps can slash costs dramatically. Choosing white or reflective interior surfaces boosts light efficiency, which can reduce future lighting expenses. For example, a 2×2 build can save about $20 to $90 against mid-range retail tents. The biggest savings are seen with larger sizes and high-end tents, where building your own could cut costs by hundreds.
What Size DIY Grow Tent Do You Actually Need?
What Size DIY Grow Tent Do You Actually Need?
Light optimization depends on matching your LED wattage to your tent volume. For example, a 2×2 tent typically uses around 80–120W of LED light, while a 4×4 tent requires 400–600W. To ensure comfortable working space, add two feet to each tent dimension; tight spaces hinder airflow and make equipment access difficult. When sizing your exhaust fan, calculate the cubic footage of your grow area. Small tents often need a 4-inch fan, whereas larger setups demand 6-8 inch models for proper ventilation. Choose a tent size that suits your room, plants, and gear—focusing on overall volume rather than just floor area ensures better growth conditions. Using seedling pots with trays can improve drainage and organization when starting plants indoors. For seed starting, using vermiculite can improve moisture retention and aeration in your growing medium. Incorporating humic acid into your soil mix further enhances root development and nutrient uptake for healthier plants.
PVC, Wood, or Metal: Best Frame for Your Grow Tent
PVC is the lightest and most affordable frame option, making it suitable for small or portable grow tents. It’s easy to assemble with simple cross fittings, but it lacks the durability needed for heavier equipment and larger setups. PVC can flex under pressure, so adding extra cross supports helps prevent movement. Keep in mind, it’s best for lightweight applications and may not hold up well in high humidity or with heavy loads over time. If you use this frame in a high-humidity environment, consider integrating components from a DIY NFT hydroponic system to improve water circulation without adding excess structural stress. For maintaining optimal conditions, pH test strips can help you quickly monitor water acidity in the system. To further manage electrical components in the tent, consult a guide for wiring a fan speed controller easily to regulate airflow.
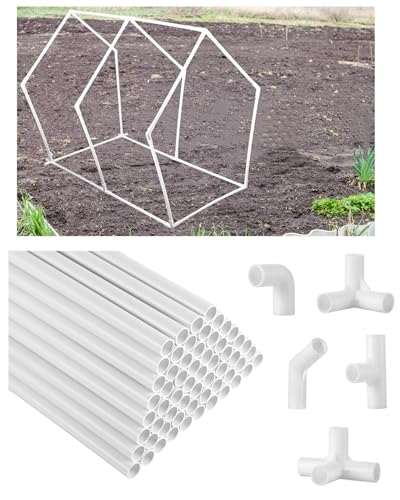
Abundant Quantity: our DIY PVC projects will receive 60 pieces of 1” diameter, 23.6” long PVC pipe, 42 PP material connecting pipe combination, including 4 120-degree elbows,4 three-dimensional five way joints,6 90-degree elbow joints,8 three-dimensional tees,8 three-dimensional four way joints and 12 flat tees for various DIY projects

Extendable Poles for Flexible Setup: Includes four mounting bars that adjust from 39" to 60", allowing flexible installation to fit different tent widths and fine-tune ventilation layouts
What Materials and Tools Do You Need for a Budget Build?
You need a variety of materials and tools for a budget build. For the reflective lining, options include Mylar, panda film, or reflective polyethylene—these boost light reflection without adding much cost. For the skin, use durable synthetic fabric or plastic sheeting, with some builds reporting costs as low as €25. For optimal indoor growth, consider pairing your setup with the best LED grow lights** for fiddle leaf fig care, as they provide ideal spectrums for healthy foliage. For robust root development, applying a quality root stimulator can significantly enhance nutrient uptake during early growth stages. Sealing and securing openings require duct tape, HVAC foil tape, PVC ties, and zippers. Your frame is built with PVC fittings: eight corners, four T-pieces, and one cross-piece, which collectively form a sturdy structure. Support bars and hose clamps** hold your lights and fans securely in place.
Ventilation requires an inline fan, a carbon filter, ducting, and clip-on oscillating fans to maintain airflow and temperature. For lighting, consider LED grow lights, which are energy-efficient, and use ratchet hangers for easy height adjustment.
Tools needed include a PVC cutter or hacksaw, measuring tape, craft knife, and sandpaper for smoothing edges. Once assembled, you will also need your growing medium and pH balancing gear to optimize plant health and growth.

Prevents grow tent walls from collapsing inward due to strong fan suction, maintaining proper structure and maximizing usable space.

✅ All-In-One Tool-Free Garden Bed Kit -- This complete raised garden set includes PVC frame, breathable felt planting bed, insect-proof mesh cover and UV sun shade cover. No extra tools needed. You can easily assemble the whole set in minutes by simply snapping frame joints together, perfect for backyard, balcony and patio gardening beginners.
How to Assemble the Frame and Attach the Reflective Lining
To assemble the frame and attach the reflective lining, begin by constructing the PVC frame on a flat surface. First, create the base as a square or rectangle, locking the corners with 90-degree connectors. Add vertical poles to the corners, then complete the top frame to form a rigid box structure. Make sure all poles are fully inserted to prevent wobbling, and reinforce with extra crossbars if needed for added stability.
Next, cut your reflective lining—such as Mylar or panda film—to match the interior dimensions of the frame. Leave an overhang of 4 to 6 inches at the door edge to allow for secure fastening and easy adjustments. Smooth out the material to eliminate wrinkles, which can interfere with light distribution, then fasten it to the frame using duct tape or Velcro strips. Ensure the reflective surface faces inward to maximize light reflection. Cover the roof, walls, and base completely, pressing seams tightly to prevent light leaks.
Inspect all edges and seams carefully for gaps or bubbles, as these can cause uneven lighting or heat loss. Secure the lining thoroughly and smooth out any air pockets; bubbles decrease reflectivity and can cause hot spots. Proper attachment of the lining ensures a clean, reflective interior, which improves plant growth by distributing light evenly and maintaining consistent climate control within your grow space.

High Quality: Made of plastic material, the fitting is able to withstand impact, not easy to crack or break.

It concludes five different of joints for different occasions of use.
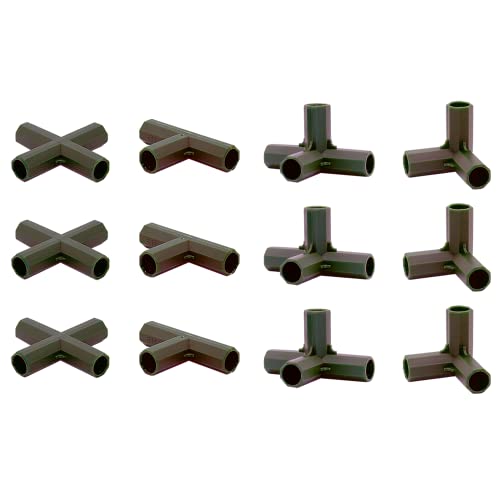
High Quality: Made of plastic material, the fitting is able to withstand impact, not easy to crack or break.
How Many Watts of LED Light Does Your Tent Need?
To determine how many watts of LED light your tent needs, start by measuring the length and width to calculate the square footage. Multiply that number by a target watts-per-square-foot figure based on your plant’s growth stage. For vegetative growth, aim for 20–30 watts per square foot; for flowering, plan on 30–40 watts per square foot.
A 2×2 foot tent, with four square feet, requires about 80–120W for low-demand crops during vegetative growth. For flowering, it should be around 120–160W. A larger 4×4 foot tent (16 square feet) needs approximately 320–480W for vegetative growth and 480–640W for flowering.
Always check the fixture’s actual wall draw instead of marketing claims. Because lux meters measure human-visible light while PAR meters measure the photosynthetically active radiation plants actually use, relying on a lux meter for indoor gardening can lead to significant inaccuracies in your wattage estimates. Make sure your lighting setup covers the entire canopy evenly for uniform growth. Use full-spectrum LED fixtures suited to your plant’s stage, and consider dimmable options to adjust intensity as your plants mature. Start with lower wattage during early stages and increase wattage as your crop grows to optimize growth and yield.
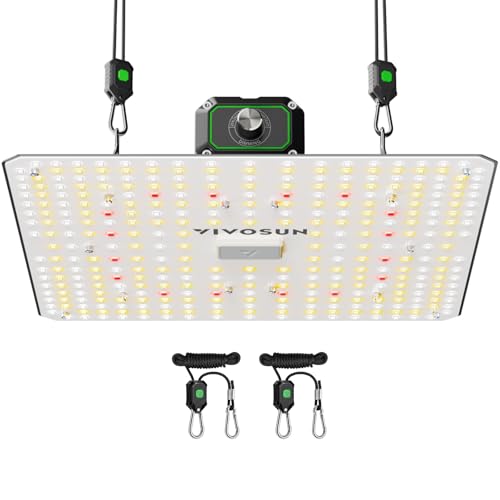
Optimized Full Spectrum: With white, blue, red and far-red LEDs (3000K, 5000K, 660nm and 730nm), this grow light provides full-spectrum illumination to support photosynthesis from seedling to harvest; It speeds up flowering time and increases yields

Optimized Full Spectrum: With white, blue, red, and far-red LEDs (3000K, 5000K, 660nm, and 730nm), this grow light provides full-spectrum illumination to support photosynthesis from seedling to harvest; It speeds up flowering time and increases yields
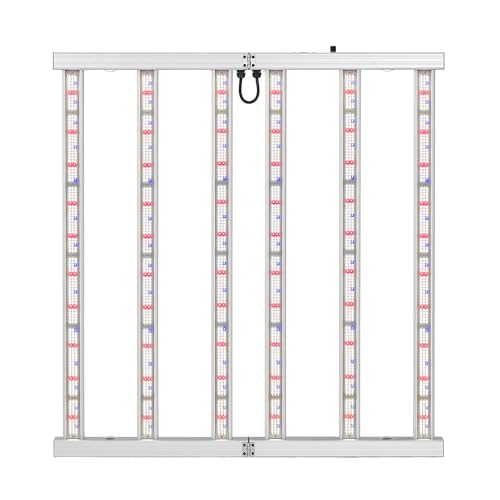
【High-Efficiency LED Grow Light】33.5 inch LED grow light has 6 unique elongated light bar that provides more uniform and comprehensive canopy coverage.
How Big of an Exhaust Fan Do You Need for Ventilation?
To determine the size of exhaust fan you need, first calculate your grow tent’s volume in cubic feet by multiplying length, width, and height. For a 4×4×6.5 ft tent, that equals 104 cubic feet. Your baseline ventilation capacity should then be approximately 104 CFM to achieve one air exchange per minute. Be sure to include corrections: add 25% for carbon filters, 10% for each 90° bend, and 5% for every 5 feet of flexible ducting. Hot rooms may require an additional increase of about 30%. Just as you would with ventilation, using a moisture meter for your ZZ plant can help you avoid overwatering and ensure you only water when the soil is dry. For orchids, selecting a correct light spectrum is equally crucial to mimic natural sunlight and promote healthy growth. Similarly, choosing the right perlite grade ensures proper aeration and drainage for orchid roots, preventing rot and encouraging vigorous development. When selecting a fan, size it based on your adjusted CFM needs, not just the raw cubic footage. For example, a 4-inch fan is typically suitable for 2×2 or 3×3 tents, while 6-inch models handle 4×4 to 4×8 tents. For larger spaces like 5×5 or more, an 8-inch fan is recommended. It’s smarter to slightly oversize your fan and throttle it down if needed, as running a slightly larger fan at reduced speed ensures better airflow management and safety. Always match your fan capacity to the higher of either the desired air exchange rate or heat removal requirements.

Excellent Odor Control: The air carbon filter is made of premium RC 412 Australian virgin charcoal with an IAV of 1200+, which has a higher absorption rate and practicality, effectively eliminating odors and chemicals in grow tents and hydroponic rooms, indoor grow tents, bathrooms, basements and kitchens.

High-Efficiency 280 CFM Airflow - Powerful 2200 RPM motor delivers exceptional ventilation capacity. This 4 inch duct fan effectively removes moisture and odors from grow tents, bathrooms, and kitchens as a reliable inline exhaust fan.

Designed to ventilate grow tents, transfer heating/cooling to rooms, circulate air, exhaust odors, and cool AV racks.
How to Manage Heat, Moisture, and Electrical Risks Safely
To manage heat, moisture, and electrical risks safely, start by ensuring your exhaust fan is properly sized for your space. Once installed, focus on controlling the three hazards that can still harm your plants and equipment.
For heat regulation, keep LED fixtures away from fabric walls and foliage to prevent burns and hot spots. Using a reliable thermometer at canopy height allows you to detect overheating early and make adjustments before damage occurs.
To control moisture, aim for a relative humidity of 40-60%. Use a digital hygrometer positioned at canopy level to monitor humidity accurately, and avoid overwatering to reduce mold risk. Maintaining proper humidity is crucial for plant health and preventing plant disease.
Regarding electrical safety, do not exceed 1,440 watts on a 15-amp circuit. Tally all your lights, fans, and dehumidifiers to stay within this limit. Never daisy-chain power strips, and always mount all plugs above pots with drip loops. Use GFCI protection for all outlets, keep cords off wet floors, and treat warm or discolored outlets as urgent warnings to prevent electrical fires.