Wondering how to tell if your soil is acidic, neutral, or alkaline without expensive tests? A simple home approach uses everyday kitchen items like vinegar and baking soda to give you a rough idea.
This quick method helps you decide if your soil needs adjustments for your plants. Keep reading to learn how to test your soil easily at home.
How to Test Soil pH With Vinegar and Baking Soda
You can check your soil’s pH using vinegar and baking soda without buying a commercial kit. Start by splitting a small soil sample into two containers. Add vinegar to one portion; if it fizzes, your soil is likely alkaline. For the second sample, mix the soil with distilled water to prevent interference from minerals and then add baking soda. If fizzing occurs here, your soil is probably acidic. No reaction in either container suggests your soil is neutral. Keep in mind that mineral content can influence the reaction strength, so this method provides only a rough idea. The test isn’t precise—think of it as a quick, low-cost way to get a general sense of your soil’s pH before performing a more accurate test, such as one using a digital pH meter. This method indicates that most garden plants prefer a slightly acidic to neutral soil pH. For a more reliable reading, you can also purchase pH test strips to compare color changes against a chart with better accuracy. If you build your own deep water culture system, you must also closely monitor the pH of your nutrient solution, as plants in such systems often require a specific pH range for optimal growth.

Quick, at home results for Soil pH, Nitrogen, Phosphorous and Potash Innovative and inexpensive soil test kit features an easy-to-use capsule system and patented color comparators

Accurate Soil pH Testing: Dewildetradingco Soil pH Test Strips offer measurements of soil pH levels (pH 3.5-9). As an essential tool for every gardener and grower, these test strips help determine the optimal pH for various plants, such as outdoor plants, indoor plants, gardens, grass lawns, fruit trees, flowers, vegetables, and forest shrubs.

How to Accurately Test Garden's Soil pH? Many growers do not able to use the correct tools and methods to obtain accurate soil ph values; NewTest soil ph test kit includes upgraded soil ph test strips, measuring cylinders, and instructions for professional testing methods; it allows even beginners to easily and accurately obtain soil ph values
Kitchen Supplies for the Test
To perform soil tests in your kitchen, gather these supplies: clean glass jars or small bowls for separate samples, distilled water to prevent mineral interference, and a measuring cup for consistent amounts. A spoon is essential for slurry preparation, and a tray helps keep everything organized. For precise nutrient analysis, use a kitchen scale to measure repeatable portions and a jumbo dropper for controlled liquid addition. Obtain pH test strips with a color chart and a small test tube for strip-based testing methods. To assess organic matter, prepare red cabbage leaves, a blender, and a coffee filter to create a natural pH indicator. Clearly label each container with markers or label tape and set white paper behind samples for easier color comparison. For cleanup, keep paper towels handy and use a notebook to record your results accurately. If you also use perlite in your soil mixes, consider pre-heating it in an oven to kill any pathogens before adding it to your samples. Using a seedling tray can also help you organize multiple test samples and keep them contained during preparation. For more direct readings, you can also use a soil pH meter to compare results with your test strips.

Comprehensive Soil Analysis: Liquid soil test kits offer a comprehensive analysis of essential soil parameters, including pH, ammonia, nitrogen, phosphorus, and potassium. Having all these measurements in one kit provides a holistic understanding of the soil's fertility and health.

Kindly NOTE: This soil tester can not be applied to test pH value of any other liquid. If the soil is too dry the indicator will not move, and water it before testing.

KNOW BEFORE YOU GROW | Grow the healthiest, sustainable lawn and garden with the most accurate and easy to use professional soil test kit on the market
How to Perform the Vinegar and Baking Soda Tests
To perform the vinegar and baking soda tests, start by collecting a small, dry soil sample and dividing it into two separate containers. For the vinegar test, add about half a cup of white vinegar to one sample and stir gently. Immediate fizzing indicates the presence of calcium carbonate, meaning the soil is alkaline. For the baking soda test, take the second sample and mix it with enough distilled water to create a muddy slurry. Sprinkle baking soda onto this wet soil and watch for bubbles. The formation of bubbles suggests the soil is acidic. These simple tests provide a rough idea of your soil’s mineral content but are not precise measures of pH. They are environmentally friendly and use common kitchen ingredients. To ensure consistent results, keep the soil samples equal in size and avoid cross-contaminating between tests. Both tests must be performed simultaneously for accurate assessment to confirm whether the soil is acidic, neutral, or alkaline. For greater precision, pH test strips can offer a more reliable measurement of your soil’s actual acidity or alkalinity. Unlike these quick home methods, laboratory testing can precisely measure both macro and micro nutrients for a complete performance analysis.

✅ 1Dial & 1 LCD Screen - Replace/install all 3 batteries each time. Put button to %RH/°F to - Turn On, and put to LIGHT to - Turn Off. Read the LCD results in 3-5 mins. (Not Water Moisture Meter, so, please don't test liquid)

【4 in 1 function】This is a 4-in-1 multifunctional soil tester.Our soil tester fastly to measure soil moisture, pH, temperature and sunlight to help you take better care of flowers and plants.You can know when you need to water your soil by measuring moisture and pH & Temperature value of the soil and sunlight level of plants with it.

Scientific maintenance: The 7 in one soil testing kit is more suitable for beginners, and can help you comprehensively understand the soil conditions of gardens and lawns, solving your confusion. You can adjust soil moisture and pH according to the values, and you can also clearly see the air temperature and humidity as well as soil temperature through the LCD display to improve plant growing conditions in time and scientifically nurture seedlings to help you make your plants flourish
How to Interpret the Fizz (And What No Reaction Means)
Once the fizz subsides, you can interpret the results based on the strength and presence of bubbling. If your soil reacts strongly with vinegar, it indicates alkaline soil with a pH above 7. The more vigorous the fizz, the higher the pH — meaning more alkaline. A weak fizz suggests only slight alkalinity, closer to neutral but still above pH 7. This method works similarly to how hydroponic systems monitor nutrient solution pH in greenhouses. For accurate readings, you should calibrate your testing materials against a precision hygrometer used to measure environmental moisture.
If baking soda causes the soil to fizz, your soil is likely acidic, with a pH below 7. Vigorous bubbling points to greater acidity, while milder fizzing indicates the soil is only mildly acidic, approaching neutral.
No reaction in either test typically means your soil is near neutral, around pH 7. This indicates neither significant acidity nor alkalinity. Remember, the strength of the fizz offers a qualitative assessment: more fizz shows a larger deviation from neutral, less fizz suggests proximity to pH 7. This quick test provides a clear directional indicator of your soil’s pH balance without complex equipment. For more precise evaluation, consider using top pruning shears for collecting branch samples.
Why This Test Is Only a Rough pH Check
This DIY pH test is only a rough check because it prioritizes ease over accuracy. It relies on simple fizz reactions to indicate acidity or alkalinity, which means you don’t get a precise numeric pH value. Instead, the test shows whether your soil is acidic or alkaline, but it cannot detect small pH changes. Variations of more than two pH units can easily be missed or misinterpreted due to color differences, lighting conditions, and your eyes’ perception.
Furthermore, this method doesn’t measure other important soil nutrients like nitrogen, phosphorus, or potassium, leaving your overall soil health status incomplete. Chemical interferences are common; recent fertilizer, lime applications, tap water minerals, or high organic matter content can all distort the results. Also, testing just one handful of soil doesn’t account for pH variation across a planting bed, so your findings aren’t representative. Without laboratory analysis that considers buffering capacity or calcium carbonate levels, this test provides only a snapshot—more of an indicator than a definitive diagnosis. For a more controlled read on your growing environment, consider how exhaust fan placement influences air circulation, which can indirectly affect soil moisture and microbial activity that alter pH over time. Moreover, cleaning your grow tent surfaces before each new cycle helps prevent dust and debris from contaminating the soil and skewing future pH readings. For improving soil structure and aeration, adding pumice or perlite can help create more consistent drainage and root conditions.
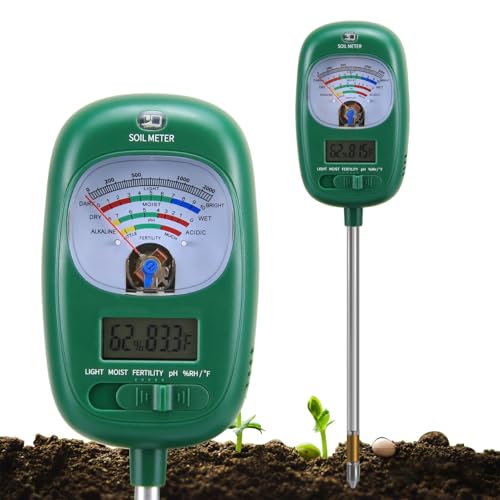
Scientific maintenance: The 7 in one soil testing kit is more suitable for beginners, and can help you comprehensively understand the soil conditions of gardens and lawns, solving your confusion. You can adjust soil moisture and pH according to the values, and you can also clearly see the air temperature and humidity as well as soil temperature through the LCD display to improve plant growing conditions in time and scientifically nurture seedlings to help you make your plants flourish
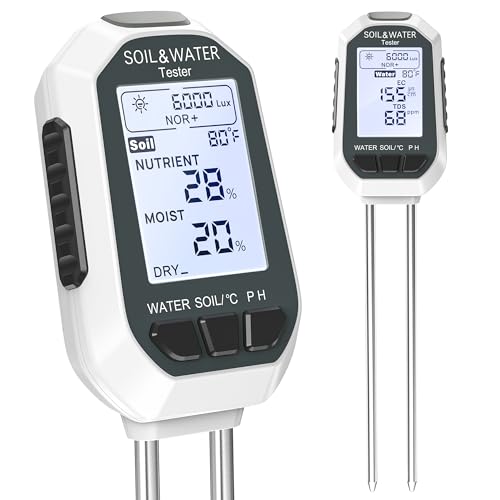
【7-in-1 Features】This is a 7-in-1 multi-function soil tester. Our soil tester quickly measures soil moisture, pH, temperature and light intensity, and its fertility function helps you take better care of your plants. With this device you can measure the soil moisture, pH, temperature and light intensity for your plants and with the EC and TDS functions you will know when it is time to water the soil.
When to Use a More Precise Soil Test
You should get a more precise soil test when correcting pH levels to ensure accuracy. Annual lab confirmation prevents overliming or overacidifying the soil, which can harm plants. If your plants display symptoms like yellowing, stunted growth, or ongoing nutrient deficiencies despite regular fertilization, a detailed lab analysis can help pinpoint the underlying issue. Additionally, re-test your soil after significant amendments or extreme weather events to verify changes. For high-value crops or when you require a confident result, it’s best to opt for laboratory testing instead of a DIY kit. For growing media like clay balls, lab testing can also confirm key properties affecting plant health. A calibrated pH meter, rather than a simple kit, provides direct measurement of acidity for accurate adjustments.

Versatile & Accurate pH Measurement: This pH meter quickly and reliably reads pH values for a wide range of liquids, including soil, pool water, plants, food, water, and more. It covers applications in gardening, agriculture, cooking, food processing, and industrial fields, accurately assessing soil fertility, maintaining plant ecological balance, and ensuring food safety

Versatile pH Meter: This pH meter is designed for multi-purpose use, enabling accurate pH measurement of food, soil, water, and more. Whether you're testing the pH of your garden soil or the pH level of your aquarium water, this pH meter has got you covered. Whether you're gardener, professional farmer,cooker,or scientist, our pH meter empowers you to accurately assess pH across different scenarios. With its adaptable design, making it ideal for use in laboratories, agricultural, kitchen (Please use this product safely to prevent splashing of the solution into eyes or hands)
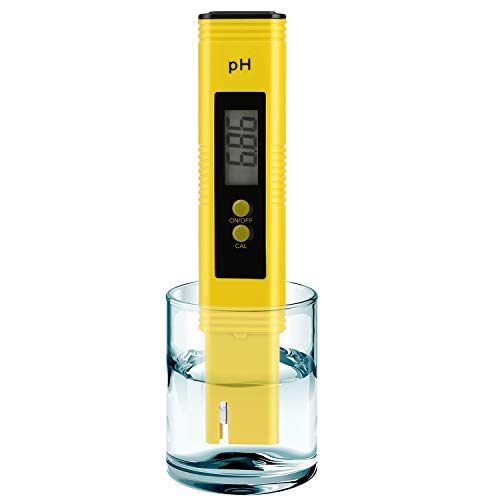
【Calibration Operation Guide】 Press and hold the CAL button for 5 seconds to access calibration mode. Complete calibration by selecting the standard powders in this exact order: 6.86 → 4 → 9.18. Please refer to our full calibration instructions and tutorial video for detailed steps.