Struggling with preparing coco coir for planting? Getting it just right can make a big difference for healthy growth.
By soaking and fluffing the brick properly, you’ll create a light, moisture-retaining medium that your plants will love.
Keep reading for step-by-step guidance on turning your coir into the perfect planting base.
Hydrate Your Coco Coir Brick With the Right Water Ratio
Start with a water-to-coir ratio of roughly 5:1 by weight to achieve the right texture. For a 650-gram coir brick, this means about 3.25 liters of water. You can add up to 4.5 liters for a wetter consistency, but avoid oversaturating. This ratio impacts nutrient absorption; too much water dilutes your nutrients, while too little prevents proper nutrient uptake. Use pH-balanced water with a pH of 5.5 to 6.5 to maintain the natural pH of the coir and prevent drift. Measure your brick’s weight, multiply by 5 to get milliliters of water, then pour into a large bucket. Let the brick absorb water for 10 to 15 minutes before breaking it apart. Always start with slightly less water than needed so you can add more if necessary—adjustments are easier than trying to fix over-saturated coir. After hydrating, you can also mix in a high-quality vermiculite to improve moisture retention and aeration for your plants. For succulents, adding perlite improves drainage and prevents the coir from retaining too much moisture. You can also test the pH of your final mix using a DIY soil pH test kit to ensure it stays within the optimal range.

🌱 Premium Super Washed Coco Coir – Triple-washed, low-EC, pH-balanced coco coir with reduced salts. Ready to hydrate and use for seed starting, container gardening, and soil amendment applications.
![MODELLOR (10 lb) Premium Super Washed Coco Coir Brick, High Yield 18 to 20 gallons [72 to 80 quarts], Seed Starter, Organic, pH Balanced, Gardening, Indoor, Outdoor use](https://m.media-amazon.com/images/I/51YfT2RlVzL._SL500_.jpg)
✨ Ultra-Pure & Ready to Use – Triple-washed, low-salt, pH-balanced coco coir that’s clean and nutrient-friendly—no rinsing required, unlike many other brands.

* MASSIVE EXPANSION RATIO: Highly compressed 5kg (11 lb) block expands to approximately 55 Liters of fresh, loose, ready-to-use coco coir substrate upon rapid hydration.
Soak Your Coco Coir Brick Evenly: No Hard Core Left
To ensure your coir brick is evenly soaked without remaining hard core, you need to hydrate it thoroughly. Start by choosing a large container or bin that allows the water to circulate freely around the entire brick. Add water gradually, in stages, rather than pouring it all at once—this slow process helps moisture penetrate to the center. As the outer layers soften, break them apart gently to expose the interior and promote even absorption. Flip or rotate the brick periodically during soaking to ensure the bottom receives equal moisture. The entire process typically takes between 15 minutes and an hour; wait until the coir appears uniformly moist and feels springy throughout. If a dense, hard core remains, re-wet the brick, rotate it again, and continue soaking until the entire piece is evenly damp and soft—rushing now only prolongs frustration later. For similar results with other growing media, you can also apply simple sterilization methods to prevent contamination before use. For growers transitioning to advanced setups, this evenly hydrated coir is the ideal foundation for top hydroponic systems designed for cannabis. Maintaining proper environmental conditions during this process also helps ensure healthy root development, and many growers find that tracking indoor air quality with a reliable monitor improves overall plant vigor.
Fluff Your Coco Coir Brick for a Loose, Soil-Like Texture
Breaking the hydrated coir brick into smaller chunks immediately after soaking speeds up the loosening process and helps achieve a soil-like texture. Use a sharp knife or garden shears to slice along the compressed layers, which reduces resistance and encourages fiber separation. Work in a large tub or wheelbarrow to make handling easier. The coir brick typically weighs around 10-11 lbs, so a large container is necessary to contain the expanded material after soaking.
Next, crumble the softened layers with your hands or a garden fork, applying gentle agitation rather than forceful crushing. This preserves the airy structure, allowing moisture to penetrate evenly and preventing compaction. As you work, stir and break apart dry pockets to ensure consistent moisture distribution. Aim for a light, crumbly consistency similar to loose soil—ideal for potting or planting.
Pay special attention to stubborn clumps. Crush any remaining dry cores with your fingers or a trowel until they blend seamlessly with the rest of the texture. Reworking these sections guarantees uniformity, ensuring roots won’t encounter hard blocks when planting. When no dense chunks remain, your coir is sufficiently fluffed and ready to use—drainable, loose, and easy to mix with soil amendments.
Test Your Coco Coir Brick’s Moisture With the Squeeze Method
To test your coir brick’s moisture with the squeeze method, start by grabbing a handful of the hydrated coir. Squeeze it firmly; you’re looking for a damp sponge feel—moist, soft, and releasing just a few drops of water. It should not be dripping or streaming wet. This quick test ensures that the coir is evenly moist throughout. While testing, remember that coco coir is naturally acidic, which can influence the final pH of your mix. If water pours out when you squeeze, the coir is overwatered. Drain any excess liquid before planting. If nothing comes out and the coir feels crumbly or dry, there are dry patches inside that haven’t absorbed water fully. Add a bit more water, wait a few minutes, then retest. Be sure to break apart the handful and check its texture—it should hold together softly without gritty, dry spots. Repeat the squeeze test after each adjustment until the moisture is evenly distributed and the coir feels just moist enough for planting. For precise measurement of that moisture level, consider using a reliable hygrometer instead of relying solely on feel. If you are using this coir for a DIY mushroom grow box, achieving the right moisture balance is critical for healthy spawn colonization.
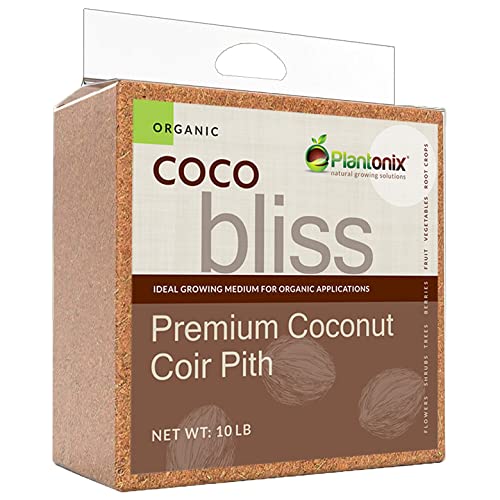
Pre-Rinsed & Pre-Screened Coco Coir - Every block of our coconut fiber substrate has been screened multiple times through an extremely small filter to get rid of any traces of fiber, sand, and rocks. This is what sets our coco coir apart, giving you pure and clean coco coir for plants, unlike others who don’t filter their coco coir for impurities.

Soil Moisture Meter: This single probe soil moisture meter is specially designed for testing the moisture level in the soil, helps you decide whether the plants need water or not, helps to keep plants alive.

🌿 SUPPORT HEALTHY ROOT GROWTH: Create the ideal growing environment with premium coco coir for plants. This lightweight coco coir soil additive improves aeration, loosens compacted soil, and supports stronger root development for healthier indoor and outdoor plants. Perfect for container plants, garden beds, seedlings, flowers, herbs, vegetables, and houseplants needing better drainage and root expansion.
Mix Hydrated Coco Coir With Soil, Perlite, or Compost
Once your coco coir is properly hydrated, mix it with soil, perlite, or compost to create an ideal growing medium. For a standard container garden, use a ratio of 75% soil to 25% coir. This blend offers balanced moisture retention and good aeration for healthy root development. To improve drainage and oxygen flow, mix 70% coir with 30% perlite. This ratio helps prevent waterlogging and ensures roots get enough oxygen. For richer, more nutrient-dense mixes, combine 60% coir, 20% perlite, and 20% compost. This combination boosts fertility while maintaining a manageable weight for containers. Because coir has a neutral pH, it allows for easy adjustment of nutrients through fertilization, and you can monitor this with a reliable pH meter for optimal growth. Remember to mix by volume since hydrated coir is lightweight, ensuring consistent texture. These ratios give you control over moisture and texture, whether you’re preparing raised beds or starting seeds. For terrariums, clay balls can also be layered at the bottom to improve drainage and prevent root rot. To support overall plant health, look for essential micronutrients when selecting your fertilizer to avoid deficiencies.