Struggling to find affordable ways to start your seeds? A clear plastic cup, salad container, or even a cut-in-half milk jug can serve as a simple, free humidity dome.
These DIY covers trap moisture and warmth, helping your seedlings sprout faster while shielding them from drafts.
Keep reading to learn how to turn everyday items into effective mini-greenhouses.
Why Bother With a Humidity Dome for Seed Starting?
A humidity dome is essential for seed starting because it creates a controlled environment that significantly boosts germination success. It retains moisture in the soil, ensuring your seed-starting mix remains evenly damp, which promotes consistent sprouting. The dome also reduces surface drying, especially crucial for tiny seeds that dry out quickly, leading to more uniform germination. Additionally, a humidity dome helps stabilize temperature by trapping warmth, encouraging faster sprouting times. It offers protection from drafts and water stress, while proper venting minimizes damping-off disease. Overall, using a humidity dome is a simple step that dramatically improves seed germination rates and seedling health. These domes also serve as a barrier to keep out pests like fungal gnats, creating a buffered, humid environment that supports robust seedling development. Without a hygrometer, you can check humidity levels by looking for condensation on the dome to ensure the internal conditions remain optimal for germination. For plants like Monstera, a moisture meter can help you verify that the soil beneath the dome is not overly wet, preventing root rot. An air stone hydroponic system uses a different method of aeration but also relies on maintaining consistent moisture for healthy root growth.
6 Free DIY Humidity Domes You Already Have at Home
Many household items can double as effective humidity domes for seed starting. Clear plastic takeout containers work well as mini-greenhouses; their lids trap moisture while allowing light to pass through, which helps reduce your watering frequency. Plastic clamshell produce boxes often have built-in, hinged domes that are perfect for small seedlings. Two-liter bottles and milk jugs cut horizontally create a dome on top and a tray below, but make sure to tape sharp edges to prevent injury. Plastic cups with clear covers act as mini-domes for individual pots, providing a controlled environment. Large clear plastic bags are another option, easily covering entire trays; just remember to vent them after germination to prevent mold. Always use sterile containers to reduce the risk of disease, which keeps soil nutrients available for healthy plant growth. Meanwhile, perlite and zeolite are alternative grow media that offer different benefits for moisture retention and aeration. For those using a full setup, pairing these domes with a carbon filter for grow tent helps control odors and maintain a clean environment. To ensure your seedlings receive proper hydration, using an accurate pH meter helps you monitor water quality and adjust nutrient uptake.
How to Make a Humidity Dome From Clear Plastic Wrap
To make a humidity dome using clear plastic wrap, start by filling your seed tray with moist seed-starting mix. Sow your seeds according to their specific depth and spacing requirements, then stretch the plastic wrap tightly across the top of the tray. Secure the wrap with a rubber band or tape around the edges, making sure it doesn’t press directly on the soil surface to prevent damaging the seedlings. Use skewers or sticks placed upright to support the wrap if it sags or needs extra tension. For a reusable setup, you can also repurpose cleaned LECA balls as a sterile drainage layer beneath the seed tray. Before using any reused materials, you can sterilize perlite by baking it in an oven to eliminate pathogens.
Poke several small holes in the plastic wrap for ventilation. These allow excess humidity and heat to escape, preventing mold and stagnant air. The plastic wrap creates a mini-greenhouse effect, trapping warmth and moisture to speed up germination while keeping the soil consistently moist. Check the setup daily to monitor moisture levels, mist if the soil feels dry, and adjust the ventilation holes if condensation becomes excessive. Since some seeds, like painted daisies, may fail to sprout due to dried soil, ensure the mix stays evenly damp before you cover it to improve overall germination success. Using a supplemental LED light can also provide consistent warmth and light intensity, which further boosts seedling vigor during germination. Once the seedlings develop their first true leaves, remove the wrap to promote healthy airflow and prevent damping-off disease.

10 Pack - Clear Plastic Humidity Domes

【Leak-Proof Design Keeps Your Workspace Clean】Each humidity dome is engineered with a drip-proof rim that prevents water from leaking onto your table or shelves. Condensed moisture safely returns to the tray below, helping maintain moisture levels while keeping your growing area dry and tidy.
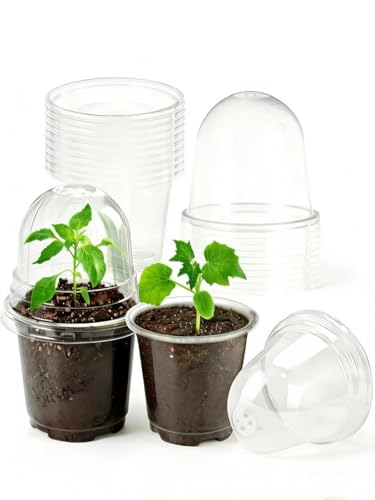
【Package】You will receive 10 pcs clear plant nursery pots, 10 pcs humidity domes.
Use a Plastic Cup as a Quick Single-Pot Dome
Using a clear plastic cup as a quick single-pot dome works well for seed starting. Simply fill your pot with premoistened seed-starting mix, plant your seeds at the proper depth, and invert a clear cup over the container. The cup traps warmth and moisture, creating a mini greenhouse that encourages germination. For optimal light exposure, select a clear plastic cup so sunlight or grow lights can reach your seedlings while moisture stays high inside. When sprouts emerge, gradually open the ventilation to prevent fungal issues, following a proper grow tent ventilation setup to avoid trapping excess humidity. Remove the dome once the seedlings’ leaves touch the inside of the cup. This method also makes watering easier; the consistent environment means you won’t need to water as often, and you can keep the media evenly moist without overwatering roots. For additional headroom, choose a taller cup. This simple, reusable setup is a cost-effective way to improve short-term germination success, similar to using MIXC nursery pots with humidity domes to enhance survival rates. For longer-term moisture control, consider pairing this method with a reliable hygrometer to precisely monitor the humidity levels inside your setup. To ensure the nutrient solution used for watering is not too strong, you can check the electrical conductivity (EC) with a simple meter.
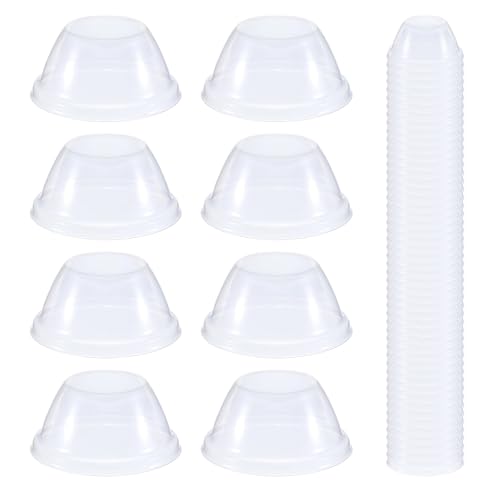
Package includes: You will receive 50 transparent plant humidity covers, sufficient quantity and suitable size to meet your daily use and replacement needs

Includes 50 Humidity Domes: Each pack comes with 50 clear humidity domes that fit for 4-inch plant pots.(This product no contains pots, it comes with domes only)

Clear Plastic Dome for Protecting New Seedlings
Turn a Milk Jug Into a Mini Greenhouse for Seedlings
Using a milk jug as a mini greenhouse involves cutting a clean gallon-sized jug horizontally, leaving a small hinge on one side so you can lift and replace the top easily. Fill the bottom half with 2 to 4 inches of moist, well-draining potting mix. This depth provides enough soil for seedlings to develop strong roots while avoiding waterlogging. For seed selection, sow each seed at the depth specified on its packet and space them according to their eventual transplant size. Leaving the cap off the hinged top allows airflow, preventing excess moisture buildup that could lead to mold or damping-off disease. Place the jug outdoors in a sunny, sheltered location; the sealed container traps warmth and humidity, creating a consistent environment that cuts down on the need for indoor grow lights and trays. To ensure healthy growth, regular pruning of the seedlings can help manage their shape, though it is not the primary focus of this setup. Check the soil moisture regularly to keep it evenly moist, and when seedlings reach 2 to 3 inches tall with true leaves, transplant them into larger containers or your garden. For labeling different seed varieties, consider using durable metal garden labels that will withstand outdoor weather and moisture without fading or rusting. This method offers an inexpensive and reusable way to start hardy seedlings successfully.

Self-Watering System: No more over-watering or under-watering! You won't need to water frequently. The bottom of the seedling tray and capillary mat maintain ideal humidity, preventing over-watering or soil drying out. This promotes healthy root development, saves time and effort, and allows you to enjoy the fun of planting with ease.

INDOOR SEED STARTING KIT: Complete growing set includes two 36-cell planting trays, one water reservoir tray, 72 super growing pellets, and a dome greenhouse cover. An easy and efficient way to start seeds indoors! Use to grow your favorite herbs, vegetables and flowers.
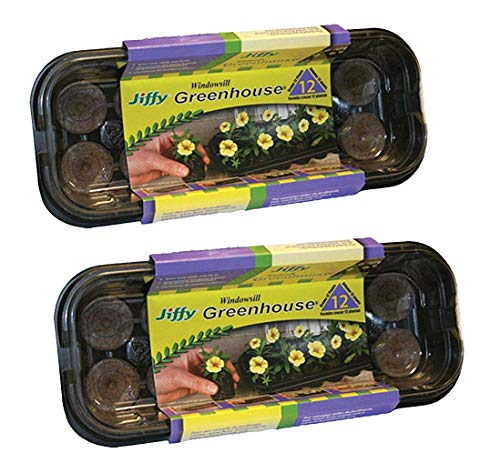
Pellets stay together when transplanting to avoid root exposure and shock
Repurpose Takeout Containers and Salad Clamshells as Domes
Takeout containers and salad clamshells make excellent low-cost humidity domes for seed starting because their transparent plastic seal tightly, creating a mini greenhouse environment. Their clear sides allow enough light for germination while trapping warmth and moisture inside. This speeds up sprouting without requiring extra expense or equipment. After use, these plastics can be repurposed as mini greenhouses for gardening, extending their life. A seedling tray typically holds multiple individual cells that organize these containers neatly on a windowsill or shelf. For precise trimming of any roots or sprouts that emerge, high-quality pruning shears ensure clean cuts without damaging delicate seedlings.
Before use, thoroughly sanitize the containers to remove any microbes, and avoid scratched or cloudy plastic, as they scatter light and hinder seed growth. Remove any moisture-wicking pads from salads. Fill the bottom with damp, well-draining seed-starting mix rather than garden soil. Sow your seeds at the correct depth, mist lightly, and then close the lid to maintain humidity. A comparable DIY system for larger plants uses Dutch buckets to recirculate nutrient solution, but for small seed starts these domes are ideal.
Watch for condensation inside the container, which indicates proper humidity levels. If water pools at the bottom, vent the container daily once seedlings appear to prevent damping-off—a common damping-off disease caused by excess moisture. This method works best for small batches on a windowsill, providing a cost-effective way to get your seedlings going strong. Keep in mind that seedling nutrition comes later; for now, focus on moisture, proper light, and gentle airflow.

12-LED GROW LIGHT PER TRAY — Each of the five seed starting trays features a full-spectrum grow light with 12 LED beads, providing supplemental light for indoor seedlings.

Clear Hydroponic Nursery Kit with Humidity Dome: this complete seed starter set includes 12 clear hydroponic nursery pots, matching nursery blocks and vented humidity domes—all essential accessories for indoor gardening, seed starting and plant propagation, ready for immediate use with no extra prep

🌱 Complete 5-Pack Seed Starting Kit: Includes 5 clear seedling trays with drainage holes, 5 sturdy clear base trays, 5 humidity domes with adjustable vents, and 10 plant labels for easy seed identification.
How to Set Up Your Humidity Dome the Right Way
To set up your humidity dome correctly, start with a soilless seed-starting mix dampened to the texture of a well-wrung sponge—moist but not dripping. Fill your trays near the rim and gently firm the surface. Sow seeds at twice their diameter deep, ensuring proper seed placement. Pay close attention to seed spacing—leaving adequate gaps between seeds allows better airflow and enhances your germination rate.
Place the dome snugly over the tray, initially closing all vents to trap humidity. Mist the surface lightly if needed but avoid pooling water, which can promote mold or damping-off disease. Set the tray under bright, consistent light or on a heat mat, maintaining soil temperatures between 70 and 80°F. Check daily for condensation; heavy droplets indicate excess moisture. Keep the medium moist but never flooded to create stable conditions, promoting uniform sprouting and healthy seedling development. Using pH test strips can help you monitor the acidity of your seed-starting mix, ensuring optimal conditions for germination. For cannabis plants, maintaining consistent light cycles during the vegetative stage is crucial for robust growth.

Domed plant tray designed to improve germination and cloning success inside a high humidity space.

Monitor Your Plants Easily: The high-quality, clear plastic of these cell trays lets you observe your plants without disturbing their root growth.

Mr. Pen seed starter tray set comes in a 5-pack with a total of 350 cells, designed to provide an efficient and organized way to start seeds.
When to Vent or Remove the Dome
You should remove the humidity dome when the first set of true leaves appears, usually within 4 to 10 days after sprouting. These leaves indicate that your seedlings are ready to handle lower humidity levels. Remove the dome gradually over one to two days, increasing airflow day by day to help seedlings adjust without stress.
Stop venting if you notice heavy condensation on the inside of the dome or the development of mold, as these signs signal a risk of fungal disease. In such cases, removing the dome sooner can help prevent problems. Once most seedlings are emerging, remove the dome entirely to promote stronger, more resilient plants. Continue to reduce ventilation gradually over several days to avoid shocking the seedlings and to maintain healthy growth.
5 Humidity Dome Mistakes and How to Fix Them
Leaving the humidity dome sealed for too long can lead to stagnant air, which increases the risk of disease and damping-off. To fix this, gradually vent the dome after germination by opening vents slightly each day, allowing fresh air to circulate and preventing excess humidity buildup. Begin this process as soon as seedlings emerge and continue until the dome is fully removed. Monitoring moisture levels and airflow helps maintain a healthy environment for your seedlings to thrive without becoming overrun with mold or pathogens. Prolonged moisture trapping also prevents the soil from drying naturally, causing excess water to pool in holeless trays, which rapidly rots roots and fosters the same fungal pathogens you are trying to avoid.