Figuring out whether you need an intake fan or an exhaust fan for your grow tent can be confusing.
Usually, the exhaust fan is the most important because it creates negative pressure, pulling in fresh air and removing stale air through a filter to control odors.
Understanding which fan to use and how to balance air flow is key to a healthy, efficient grow environment.
Keep reading to find out what works best for your setup.
Why Exhaust Fan Comes Before Intake Fan
The exhaust fan takes priority over the intake because building negative pressure first ensures proper airflow direction. By exhausting more air than you bring in, you create a slight inward pull on your tent walls, which isn’t a flaw but a sign that the exhaust is effectively pulling air out. This helps remove heat from the top where warm air naturally rises, ensuring heat is expelled efficiently before entering. It also enhances odor control by drawing air through your carbon filter first, maximizing its effectiveness before the air exits. By powering the exhaust high, you establish consistent air circulation, with passive intake simply receiving air rather than driving flow. This approach mirrors the principle of full spectrum LED grow lights, which provide a balanced light output to optimize plant growth across all stages. When using coco coir as your growing medium, the coco coir structure naturally retains moisture and air, which works best when the air exchange from the exhaust keeps humidity levels stable and prevents mold. For hydroponic strawberry setups, selecting a deep water culture system can further enhance root oxygenation and nutrient uptake. This setup keeps your space sealed, simple, and focused on moving air out first, creating a controlled environment that maintains temperature, humidity, and odor containment.
When (and How) to Add an Active Intake Fan
Adding an active intake fan is advisable when passive ventilation alone can’t maintain proper airflow. Signs include walls not bowing inward, zipper flaps remaining loose, or airflow feeling weak and insufficient to replace exhausted air. These indicators suggest your passive intake is choking the exhaust and cannot keep up with your ventilation needs. In contrast, materials like lava rock and pumice require different considerations for airflow and stability in your project setup. For growers using such materials, a root stimulator can encourage healthy development despite airflow challenges. For those selecting cutting tools in the garden, the Fiskars bypass pruning shears offer exceptional quality and performance for precise trimming tasks.
To install an active intake, match the airflow to about 70–90% of your exhaust fan’s capacity, which generally means using a fan that is roughly 20–30% less powerful. Place the intake fan at a lower port, opposite the exhaust, to encourage diagonal airflow that promotes better circulation inside the tent. Secure the ducting tightly to prevent leaks, and add a backdraft damper to stop reverse airflow when the fan is off.
After installation, close the tent and observe whether the walls bow inward slightly, indicating proper negative pressure. Adjust the fan speed if the intake fan causes an inward bowing that exceeds what your exhaust manages, ensuring a balanced system. Recheck temperature and humidity immediately after any change to confirm that airflow remains optimal and your environment stays stable.

Excellent Odor Control: The air carbon filter is made of premium RC 412 Australian virgin charcoal with an IAV of 1200+, which has a higher absorption rate and practicality, effectively eliminating odors and chemicals in grow tents and hydroponic rooms, indoor grow tents, bathrooms, basements and kitchens.

Durable Fan Material: Constructed from reinforced and corrosion-resistant metal for long-lasting reliability; The fan has a strong motor which features a permanently lubricated bearing that operates quietly and requires no maintenance

A duct fan designed to increase existing airflow in HVAC systems and ventilate home spaces like attics and workshops.
Balancing Pressure: Intake vs Exhaust
To balance pressure in your tent effectively, aim for a slight negative pressure—meaning your exhaust fan should move more air than your intake. This creates an inward pull that causes air to enter through your designated intake points instead of escaping through seams or pinholes. You’ll notice the tent walls bow slightly inward, confirming the negative pressure. Make sure your active intake fans run slower than your exhaust to maintain this balance; if your intake is too strong, it can create positive pressure. Positive pressure pushes air through airflow barriers and bypasses your filtration, defeating your efforts to control airflow. To ensure your readings are reliable, use a best pH meter for water to test the accuracy of your humidification setup. For consistent plant health, check the moisture level in the soil with a moisture meter for bird of paradise to avoid overwatering. Selecting a top grow box with proper venting can also simplify achieving this balance.
For humidification control, a stronger exhaust helps prevent moisture buildup by continuously pulling air out and reducing stagnation. However, avoid restricting intake openings—use passive vents that are larger than your exhaust openings to prevent airflow restrictions. Check for inward airflow at zipper seals using a tissue; if tissue escapes, reduce your intake speed. Always seal unused ports because leaks undermine negative pressure. The goal is steady, gentle suction that stabilizes airflow without causing the tent to collapse.

Powerful Airflow: Delivers strong airflow up to 345 CFM, efficiently enhancing ventilation and removing exhaust; Designed for easy mounting on walls, ceilings, or duct openings, and ideal for grow tents, greenhouses, basements, bathrooms, kitchens, attics, and workshops

Powerful Airflow: Delivers strong airflow up to 130 CFM, efficiently enhancing ventilation and removing exhaust; Ideal for grow tents, greenhouses, basements, bathrooms, kitchens, attics, and workshops

Powerful Air Circulation: This 8-inch inline booster fan delivers airflow up to 640 CFM, quickly improving air exchange and exhaust; Flexible & mountable design makes it ideal for grow tents, greenhouses, basements, bathrooms, kitchens, workshops, and other ventilation needs
Sizing Exhaust vs Intake Fans
Start by sizing your exhaust fan first, as it directly controls heat removal and odor management in your grow tent. Calculate your tent volume in cubic feet and aim for at least one air exchange per minute, which translates to your baseline CFM. To account for additional factors, add about 25% for a carbon filter, approximately 5% for every 5 feet of reflective ducting, and 10% for each 90-degree bend in the ducting. Hot ambient temperatures may require an extra 30% increase in CFM to maintain optimal conditions. For growers also focused on plant health, selecting quality perlite options can improve root aeration and drainage in your grow medium. Similarly, maintaining your tools with sharp pruning shears ensures clean cuts on hydrangeas to prevent disease during garden maintenance. Before using perlite in your grow medium, sterilizing perlite effectively prevents contamination and promotes healthier root development.
For the intake, you generally can select a smaller fan or even utilize passive intake vents. Many 2×4 and 4×4 tents operate effectively with passive intake or a small 4-inch fan. The goal isn’t to oversize your intake but to match it with your exhaust capacity. To prevent light leaks and pest entry, seal passive intakes thoroughly and use light-proof ducting when active intake fans are employed. The key is to size your exhaust first and then add active intake only if passive intake cannot keep pace with the exhaust airflow.
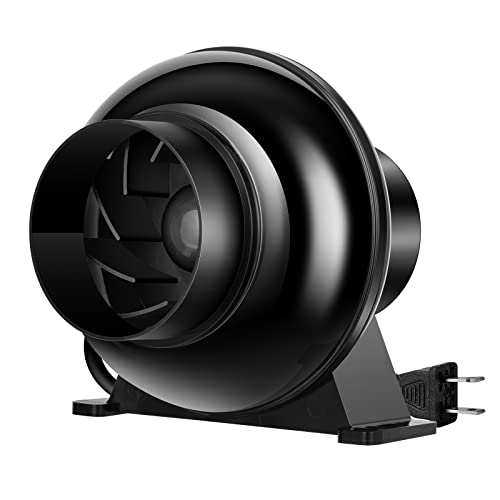
Powerful Airflow: This powerful blower with a fan speed of 2500 RPM can create an airflow of 195 CFM; It works efficiently in ventilating grow tents, transferring heat or cool rooms, circulating fresh air, as well as controlling proper humidity, temperature, and air quality for your grow area
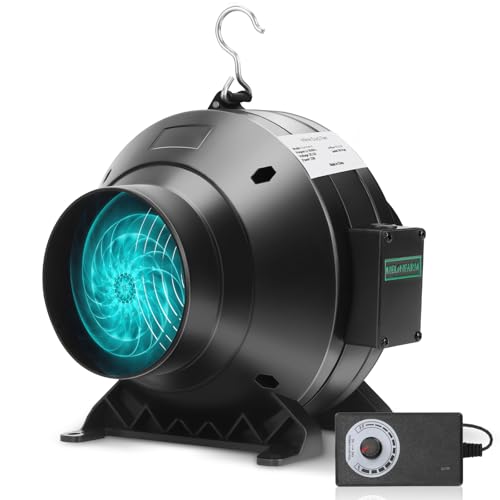
Energy-Efficient Ventilation: The inline duct fan combines the features of axial , delivering powerful airflow up to 190 CFM with a fan speed of 2300 RPM. It efficiently circulates air while maintaining low energy consumption, making it ideal for various ventilation needs.

Efficient and Quiet Ventilation: The PWM-controlled EC motor and mixed-flow design deliver powerful, quiet, and energy-efficient performance; Operating at 2800 RPM, this fan generates 195 CFM of airflow with low energy use and a noise level of just 28 dB
Why Odor Control Still Starts With Your Exhaust Fan
Your exhaust fan actually determines your odor control effectiveness because it creates the airflow needed to actively remove smells. Without proper sizing and placement, you rely on passive leakage rather than targeted air filtration. The fan pulls air through a carbon filter first, capturing odors before any scented air can escape through seams or ports.
Maintaining negative pressure is crucial. By setting your exhaust fan to run slightly stronger than your intake, you draw air inward, causing the tent walls to collapse slightly. This prevents scented air from leaking out through zippers or vents and instead directs it toward the filter. Mount the filter on the exhaust side, keep your fan running continuously, and you’ll establish a system that actively scrubs odors rather than letting them leak out passively. Unlike air stones without a pump, which cannot move air on their own and rely on passive diffusion, your exhaust fan requires a pump to actively drive the filtration process. For similar reasons, the best perlite for succulents enhances drainage by creating physical airflow pockets in the soil, preventing root rot. Applying humic acid in early spring aligns the treatment with the lawn’s natural growth cycle, maximizing nutrient uptake and soil health.