If you’re wondering how to get accurate pH readings, calibration is the key. Properly calibrating your pH meter ensures reliable results and consistent measurements.
In this guide, you’ll learn the simple steps needed to calibrate your device correctly, starting with the essentials and moving through to advanced tips.
Let’s get your pH meter performing at its best.
Start pH Meter Calibration With pH 7 Buffer
Start pH meter calibration with a fresh pH 7 buffer to establish the neutral zero point. Proper electrode placement is essential: fully submerge the sensing bulb and junction in the buffer, then rinse the electrode with deionized water beforehand. Avoid wiping the glass; instead, gently blot it dry with a lint-free tissue. Allow the reading to stabilize, which typically takes 30 to 60 seconds, before locking in the offset. This step calibrates the asymmetry potential and enhances the accuracy of subsequent measurements. Always start with a fresh pH 7 buffer for each calibration session, even if performed daily, to prevent contamination. Reusing buffer can lead to skewed readings, so keep a clean, small container dedicated to each use to preserve buffer integrity. For accurate plant care, consider that substrate aeration materials like perlite can also influence pH stability in growing mediums. Regular calibration ensures your device maintains its pH meter accuracy for reliable water testing.

Reported values are accurate to +/- 0.01 pH at 25 °C and are traceable to NIST Standard Reference Materials (SRMs).

Reported values are accurate to +/- 0.01 pH at 25 °C and are traceable to NIST Standard Reference Materials (SRMs).

Precisely Calibrate & Protect Your pH Meters – The GIDIGI pH Solution Kit includes 3x50ml pH buffer calibration solutions (4,7,10 pH buffer solution) and KCl pH electrode storage solution, designed for flawless pH solution calibration and long-term probe care. Our high-accuracy (±0.01pH @77.0℉) ph calibration solution ensures reliable readings for lab, pool, hydroponic and more. The double-sealed, ready-to-use ph meter calibration solution requires no mixing—just dip your probe for instant calibration. Bonus: ph probe storage solution extends electrode lifespan, making this kit a must-have for ph meter storage solution needs.
Rinse and Calibrate With pH 4 or 10 Buffer
After rinsing the electrode, it’s recommended to calibrate with the second buffer to ensure accurate measurements across your sample range. Use pH 4 for acidic samples and pH 10 for alkaline ones, aligning with the expected pH of your test solutions. Proper buffer preparation—making sure the solutions are fresh and uncontaminated—helps maintain calibration integrity. Hold the rinsed probe over a waste container, then gently blot it dry with a lint-free tissue, avoiding rubbing the glass bulb to prevent static charges. Immerse the probe fully in the buffer, covering the sensing bulb and reference junction. Wait about two minutes until the reading stabilizes. Once stable, adjust your meter to match the buffer’s certified pH value. Rinse the electrode again after calibration to remove any buffer residue, then blot dry. This second calibration point enhances the overall accuracy of your pH measurements for your sample’s expected pH range. Similar to how sterilizing perlite requires proper preparation to ensure its effectiveness, fresh buffer solutions are essential for reliable calibration. Maintaining a consistent humidity controller during storage prevents buffer evaporation and contamination. For a quick check between calibrations, AZO pH test strips can provide a reliable visual reference for your sample’s acidity or alkalinity.
Add a Third Point for Wide-Range Accuracy
Adding a third calibration point is essential for wide-range accuracy. Typically, electrodes respond non-linearly from pH 0 to 14, so three calibration points better fit the electrode’s curve, especially at the acidic and alkaline extremes. This additional point improves confidence in your readings across the entire pH range you work with. Your calibration range should extend beyond your sample range to prevent extrapolation, which can introduce errors. For example, if your samples are around pH 9, calibrate with buffers that reach at least pH 10 to ensure accuracy.
Buffer selection should be based on your specific samples. Don’t rely solely on default buffers. If your samples are near pH 9, choose buffers that reach at least pH 10. Standard three-point sets often use pH 7.00, 4.01, and 10.01, but for more precise calibration, you might need to use buffers at pH 4.00, 6.86, and 9.18 depending on your sample range. Space calibration points no more than 3 pH units apart and no closer than 1 unit to ensure the electrode’s response curve is captured accurately. Proper spacing also helps your meter recognize buffers automatically and accounts for electrode nonlinearity. Always verify the calibration by testing with an independent buffer not used during calibration. If the reading is off by more than ±0.05 pH, recalculate, redo the calibration, or inspect your electrode to ensure it’s functioning properly.
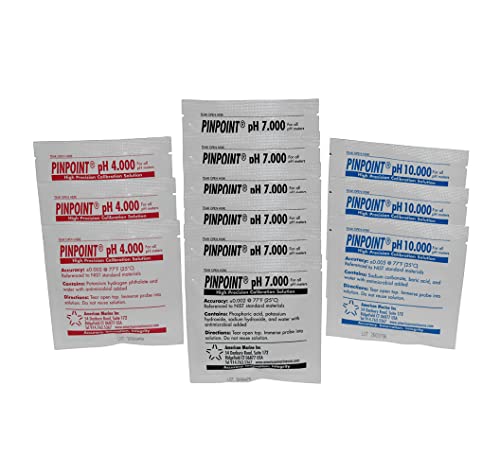
High-precision calibration fluids

pH buffer calibration solution powder accuracy is plus or minus 0.01pH, accurate and precise

【Complete Kit】 Includes 3 × 250mL pH Calibration Solutions (pH 4.00, 7.00, 10.01) and 1 × 250mL KCl pH Electrode Storage Solution. Free four refillable 50ml bottles included.
Check the Slope to Verify pH Meter Calibration
After calibration, check the slope to confirm that your electrode responds properly. Switch your meter to millivolt (mV) mode. Measure the voltage in a pH 7.01 buffer, then in a pH 4.01 or 10.01 buffer. Calculate the voltage difference per pH unit by subtracting the two readings and dividing by the pH change, which is 3 or 6 units. The theoretical voltage change at 25°C is approximately 59.16 mV per pH unit. A healthy electrode slope should be between 95% and 105% of this value, roughly 56 to 62 mV per pH unit. A lower slope indicates reduced electrode performance, often caused by aging or contamination. Regularly tracking the slope after each calibration helps detect drift early and extends calibration intervals. Always use fresh buffers and rinse the electrode thoroughly between measurements to ensure accuracy. If the slope falls below 90%, thoroughly clean or replace your electrode, as unreliable response compromises measurement reliability.

High Accuracy: These high-purity buffer powders ensure precise pH calibration with ±0.01 pH accuracy at 25°C/77°F; They keep your pH testers sharp and reliable for consistent results

Easy To Use: Mix the buffer powder with 250 ML distilled water, put the pH meter in the solution and gently stir and wait a few seconds for the result

【What You Will Get 】:Includes 3 bottles 50ml 4.00,7.00,10.01 Calibration Solution and 2 bottles 10ml pH Electrode Storage Solution
Avoid Common Calibration Mistakes
To ensure your pH meter calibration remains accurate, avoid these common mistakes. First, always use fresh buffers; expired buffers can drift silently, leading to incorrect calibration. Never return used buffer to the original bottle—contamination from residual ions can permanently skew your results. Use unopened or freshly aliquoted buffers for each calibration point to maintain consistency. Unlike standard lamps, which may overheat from inappropriate bulbs, pH electrodes are designed for specific buffer ranges, so avoid using standard household bulbs for calibration solutions.
Proper electrode maintenance is crucial. Rinse the electrode thoroughly between different buffers to remove residual ions that could carry over and affect subsequent calibration points. After rinsing, gently blot the electrode with a clean tissue instead of rubbing, as rubbing can create static charge and impact readings. Avoid touching the glass bulb directly to prevent contamination or damage. For optimal results, consider using root stimulator additives only after confirming your solution’s pH is correct, not during calibration.
Waiting for the reading to stabilize before recording is essential. Rushing this step increases the risk of inaccuracies. Confirm that the calibration temperature matches the sample temperature within 10°C; temperature differences can alter pH readings. Paying attention to these details helps maintain calibration accuracy and reliable measurements.
Store and Maintain Your pH Electrode Properly
To store and maintain your pH electrode properly, keep the glass bulb and reference junction hydrated at all times. Never let the bulb dry out—use the manufacturer’s storage solution or a pH 4 or 7 buffer to prevent dehydration. Avoid storing the electrode in distilled water, as it leaches ions and damages the hydration layer, which is essential for accurate measurements. For liquid-filled electrodes, check the fill hole regularly, refill with the appropriate electrolyte if needed, and close it tightly to prevent leakage during storage. Consider using a vertical hydroponic system if you frequently test nutrient solutions, as proper pH management is critical for plant health in such setups. Keep in mind that pH test strips have a limited shelf life and should be replaced if they yield inconsistent results. Using a moisture meter to check soil wetness can help prevent overwatering, a common issue for many houseplants including Bird of Paradise.
Before and after each use, rinse the electrode body with clean water and inspect the bulb for any signs of damage or fouling. Clean the electrode according to the manufacturer’s recommended procedures if it becomes dirty or coated with residues. Keep the storage cap filled with storage solution and ensure the bulb remains moist at all times. Proper maintenance and storage practices considerably extend the lifespan of your pH electrode and help ensure precise, consistent calibration results.
Troubleshoot Low Slope and Unstable Readings
If the slope drops below 85–90% after cleaning and recalibration, suspect buffer contamination or expiration. Always use fresh buffers to ensure accurate readings. Check for trapped air bubbles on the bulb and gently remove them, as they can interfere with proper contact. A clogged reference junction can cause readings that never settle or fluctuate unpredictably, so inspect and clear any blockages. If poor slope and unstable readings continue despite these steps, replacing the electrode is usually necessary.

𝑨𝑪𝑪𝑼𝑹𝑨𝑻𝑬 𝑷𝑯 𝑴𝑬𝑨𝑺𝑼𝑹𝑬𝑴𝑬𝑵𝑻𝑺-With a measuring range of 0.00-14.00pH, this pH meter delivers precise readings every time. The replaceable pH electrode is easy to calibrate, ensuring accurate results with every use

Long Body, 300cm cable with BNC socket and measure pH range 0.00 - 14.00pH

Built-in temperature sensor, testing pH and temperature simultaneously, enabling ATC (Auto. Temp. Compensation)
Verify Calibration With a Check Buffer Before Use
Before using your pH meter, verify its accuracy by performing a check with a third, independent check buffer that was not used during calibration. The check buffer should ideally bracket your sample range to ensure the meter’s performance across the expected pH spectrum. Use a fresh aliquot from a new lot of buffer to prevent contamination. Alternative verification methods, such as confirming the buffer lot’s certified value through a composition analysis, can add confidence in the buffer’s reliability. For growers using coco coir, it is particularly important to measure pH accurately since coco coir naturally buffers pH and can affect nutrient uptake. This is similar to how a hydroponic tower relies on a nutrient solution to deliver essential elements directly to plant roots.
The observed reading must match the expected value within your lab’s specified tolerance, usually ±0.05 pH for mid-range standards. If the check buffer reading is outside this range, do not proceed. Recalibrate immediately, check your electrode for possible issues, and verify that you have selected the correct buffer value. Never reuse buffer portions, and document the true buffer value, the observed reading, and any corrective actions taken. Performing this verification step ensures your calibration remains valid before analyzing your samples. This careful approach mirrors the essential role that a seedling tray plays in ensuring consistent germination conditions across your grow setup.

Easy to use: Mix the buffer powder with 250ML distilled water, put the pH meter into the solution, stir gently, and wait for a few seconds to get the result.

Easy to use: Mix the buffer powder with 250ML distilled water, put the pH meter in the solution and gently stir and wait a few seconds for the result.

Suitable with most of pH meters, Ideal for Calibrating